Ultimate Step-by-Step Guide to Moving Out of College Dorm
Cleaning your dorm room before move-out day is one of the easiest ways to avoid unnecessary charges and leave on a positive note. Most schools expect students to remove all personal belongings, clean their rooms, and complete a final inspection before checkout. Following a simple cleaning routine can help you stay organized, complete your walk-through with confidence, and officially wrap up your dorm move without any last-minute surprises.
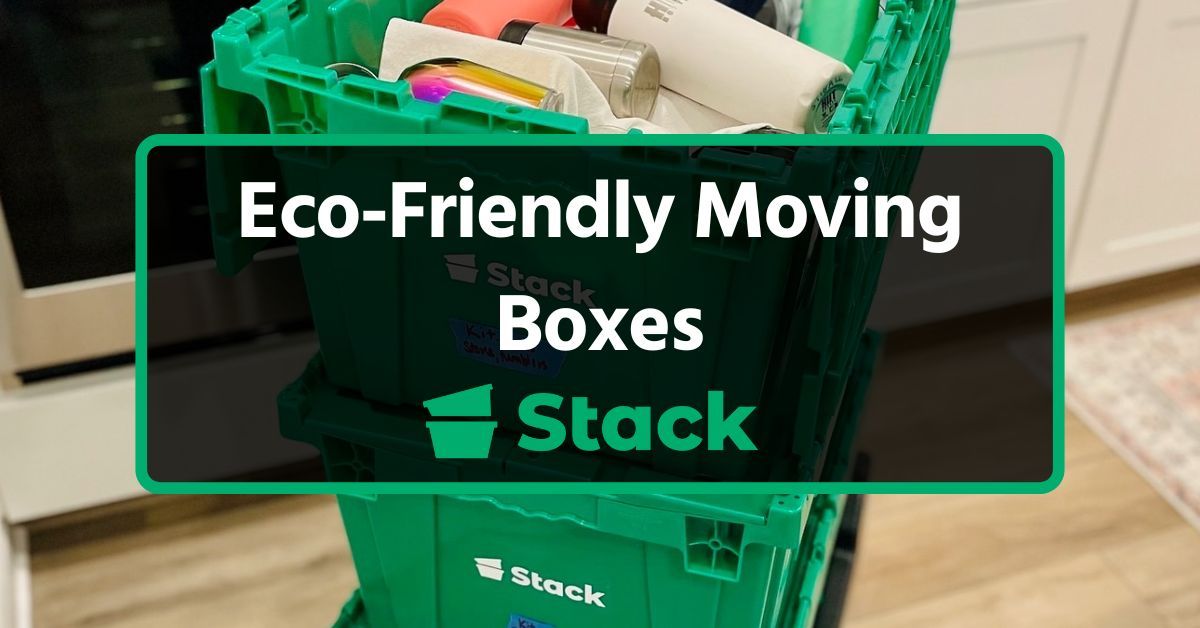
Moving out of a college dorm comes with enough to think about without worrying about finding boxes, protecting your belongings, or cleaning up piles of cardboard afterward. For the past three years, Stack Moves has helped college students, homeowners, and businesses move more efficiently with durable, reusable moving bins delivered directly to their door. Made from recycled plastic, our bins provide a convenient, sustainable alternative to traditional cardboard boxes while helping customers save up to 40% on moving supplies. Contact Stack today to reserve your moving bins and make your dorm move-out simpler from start to finish.
In this guide, we’ll walk you through every essential step for moving out of a college dorm, including what to do, what not to forget, and how to stay organized from start to finish.
What Are the Steps for Moving Out of a College Dorm?
It is a lot easier to move out of a college dorm when you take it as a series of manageable stages instead of one big overwhelming task. There is usually a lot going on between preparing for finals week, packing up your dorm room, cleaning, and trying to meet up with your school’s move-out date that it’s easy to overlook some important details. Because of this, we have come up with an easier approach that has helped college students make their moves easier, which made us realize that the smoothest transitions always begin with a clear path. So to help you figure out what to do next, we recommend following the D.O.R.M.R.O.O.M Framework to help you stay organized from the planning stage till when you officially check out. This will break down the entire process into practical steps that you can follow to help keep your belongings safe, avoid common mistakes, and move with confidence.
D- Decide What You’re Taking
The first step before you even start packing any box is to go through everything you have in your dorm room and decide what you will keep, donate, sell, or throw away. When you start this process, like two to three weeks before move-out day, you get enough time to sell furniture on Facebook Marketplace, donate usable items, and recycle anything that is no longer useful. This process helps you save space, reduce the number of sturdy boxes that you will need, and avoid having excess belongings that you wouldn’t need after the school year. The United States Environmental Protection Agency places source reduction and reuse above recycling in its waste management hierarchy because extending the life of usable products conserves resources and reduces waste. Michael Weaeedian also notes that, “The easiest dorm moves aren’t the ones with the fewest belongings; they’re the ones where students decide what truly needs to make the trip before they start packing.”
O- Organize Your Move-Out Plan
Once you’ve decided what you’re taking, create a moving timeline that works around classes, exams, and your official move-out date. Most schools publish checkout instructions well in advance, so review your housing portal early, note important deadlines, reserve any required parking permits, and coordinate responsibilities with your roommates to avoid last-minute confusion. If you’re leaving campus immediately after finals week, spread your tasks over several days instead of trying to finish everything the night before. At Stack, we’ve found that students who plan ahead are far less likely to forget essentials like returning access cards, clearing out the mini fridge, or scheduling transportation. Lorem Ipsum explains, “A move-out checklist doesn’t just keep you organized, it gives every task a deadline so nothing gets left until the last minute.”
R- Ready Your Packing Supplies
Having the right packing supplies before you begin makes every part of your dorm move easier. Gather packing tape, packing paper, bubble wrap, permanent markers, labels, scissors, and trash bags before you start, then estimate how many moving boxes or reusable bins you’ll need based on the size of your room. If you’re storing items over the summer, choose containers that can withstand stacking and moisture better than worn or damaged cardboard. It’s also worth setting aside a separate bag for everyday essentials, so you won’t have to search through multiple boxes on your first night home or in your new place. Preparing your moving supplies ahead of time keeps the packing process efficient and helps you avoid unnecessary trips to the store.
M- Move Smart
With your supplies ready, you can start packing strategically instead of rushing through your room. Pack one area at a time, place heavier items at the bottom of each box, and cushion fragile items with packing paper, towels, or clothing to reduce the risk of damage during your trip home. Clearly label boxes with both their contents and destination so unpacking is quicker whether you’re heading home, moving into a college apartment, or using a storage unit. If you’re transporting bulky items like a mini fridge, use a dolly or ask a friend to help instead of carrying everything alone. Smart packing saves time on move-out day and makes unloading much less stressful.
C- Clean Your Dorm Thoroughly
Once your belongings are packed, give your dorm room a thorough cleaning before inspection. Most schools expect students to leave rooms in good condition, and failing to clean can result in additional charges or lost deposits. Divide cleaning responsibilities with your roommate, wipe down desks and shelves, empty the mini fridge, vacuum or mop the floors, and remove all trash before your walkthrough. Don’t forget hidden areas like closets, drawers, windowsills, and underneath the bed where small items and dust often collect. A clean room not only helps you avoid penalties but also makes the checkout process much smoother.
H- Handle the Room Inspection
Before you leave campus, prepare for your room inspection with your resident assistant or dorm staff. Take timestamped photos of the room after cleaning, as they can help document its condition if questions arise later about damages. Have your access cards, keys, and any required paperwork ready before the walkthrough begins so you don’t delay the checkout process. Eiusmod Tempor says that “Five extra minutes spent checking the room before the inspection can save students from unnecessary stress after they’ve already left campus.” Once your room has been approved, you’ll be one step closer to officially completing your dorm move.
E- Empty Every Corner
Before locking the door for the last time, complete one final sweep of your room and any shared spaces. Check under the bed, inside drawers, behind doors, and in closets for chargers, documents, or other personal items that are easy to miss during a busy move. Look around common areas as well, especially if you’ve been sharing appliances or storage with roommates. Donate usable items through campus collection points whenever possible instead of leaving them behind, and dispose of everything else responsibly. Spending a few extra minutes now can prevent an unnecessary return trip later.
C- Confirm Your Checkout
With your room empty and inspection complete, finish your school’s official checkout process before heading home. Return your keys and access cards, confirm your checkout has been recorded, and keep any paperwork or receipts provided by the housing office. If you’re using a storage facility or storing belongings over the summer, double-check your transportation plans before leaving campus. When you have a final review of your moving checklist, it helps ensure that nothing has been overlooked. Completing every administrative step now lets you leave campus knowing your move is officially finished.
K- Kick Off Your Next Chapter
Moving out marks the end of one chapter and the beginning of another, so take a moment to appreciate how far you’ve come. Spend time with your friends, thank your roommate or resident assistant, and celebrate everything you accomplished during the school year before everyone heads in different directions. Whether you’re heading home, starting an internship, studying abroad, or preparing for another semester, leaving your dorm in an organized way makes the transition much less stressful. Good planning today also makes your next move easier because you’ll already know what works and what doesn’t. Once you’re settled into your next space, you’ll be glad you gave your move-out the same attention you gave move-in.
How to Choose the Best Packing Supplies for Your Dorm Move
The packing supplies you choose can have just as much impact on your dorm move as the way you organize your belongings. While many college students default to cardboard boxes, they’re only one of several options available for moving out of a college dorm. The best choice depends on what you’re packing, how far you’re traveling, and whether you’ll be storing your belongings after move-out day. At Stack, we’ve found that choosing the right containers before you start packing helps students stay organized, protect fragile items, and avoid unnecessary stress. Use the comparison below to find the packing solution that best matches your move.
| Packing Option | Best For | Advantages | Things to Consider |
|---|---|---|---|
| Plastic moving bins | Dorm belongings, storage, fragile items | Durable, stackable, reusable, moisture-resistant | Usually rented instead of purchased |
| Cardboard boxes | Everyday household items | Affordable and widely available | Can weaken with moisture or repeated use |
| Moving bags | Clothes, bedding, shoes | Lightweight, flexible, easy to carry | Offer less protection for fragile items |
| Suitcases | Books, electronics, valuables | Built-in wheels, sturdy construction | Limited capacity for bulky items |
There’s no single packing option that’s right for every move, which is why many students use a combination of containers. Cardboard boxes work well for everyday belongings, moving bags are convenient for clothing and bedding, and suitcases provide extra protection for heavier valuables like books or electronics. If you’ll be storing items over the summer or making a long trip home, durable plastic moving bins offer additional protection against moisture and are easier to stack inside a vehicle or storage unit. If you’re unsure which option fits your move, our guides on moving bags vs. boxes, best packing storage containers for moving, best totes for moving, and the best dolly for moving can help you choose the right solution.
Whichever containers you choose, don’t overlook the accessories that help protect your belongings. Quality packing tape, packing paper, bubble wrap, labels, and permanent markers help keep boxes secure and make unpacking much easier once you reach your destination. For students carrying bulky items like a mini fridge or making several trips from upper-floor residence halls, a foldable dolly or hand truck can also reduce lifting and speed up the move. If you’re looking for a more durable and eco-friendly alternative to cardboard, Stack’s reusable moving bins arrive ready to use, stack neatly, and eliminate the need to break down or recycle boxes after your move. Choosing the right packing supplies from the beginning helps make every stage of your move more organized, efficient, and less stressful.
Step-by-Step Dorm Room Cleaning and Inspection Process
After weeks of classes, assignments, and finals week, the last thing you probably want to do is spend hours cleaning your dorm room. Still, taking the time to do it properly can save you from unnecessary charges and make checkout much less stressful. Most schools expect students to leave their rooms clean before moving out, so it’s worth setting aside enough time to get everything done without rushing. At Stack, we’ve found that breaking the cleaning process into smaller tasks makes it much easier to stay on track. Here’s how to leave your room in great shape before move-out day.
Start with the Areas You Use Most
Begin by cleaning the spaces you used every day, including your desk, shelves, windowsills, and bedside table. Remove everything from the surfaces before wiping away dust, stains, or sticky residue that may have built up throughout the school year. If your room includes a bathroom, clean the sink, mirror, toilet, and shower before moving on to the next area. Keeping your cleaning supplies, paper towels, disinfectant, and trash bags within reach will help you work through the room more efficiently instead of stopping every few minutes to look for something.
Don’t Forget the Hidden Spots
It’s easy to focus on what’s right in front of you and completely forget the places you don’t see every day. Open every drawer, closet, and cabinet, then check underneath your bed and behind furniture for chargers, important documents, clothes, or sentimental items that may have slipped out of sight. If you have a mini fridge, empty it completely, unplug it, defrost it if required by your school, and wipe the inside and outside before moving it. According to the University of Illinois Urbana-Champaign Housing Office, students should remove all personal belongings and prepare their room for inspection before checking out, making a final sweep one of the simplest ways to avoid leaving something behind.
Get Ready for Your Room Inspection
Before your walk-through with your resident assistant or dorm staff, take a few timestamped photos of your room after you’ve finished cleaning. They provide a record of your room’s condition and can be helpful if questions come up after you’ve moved out. Michael Weaeedian says, “One last walkthrough before the official inspection gives students a chance to catch small issues that are easy to miss when they’re focused on packing.” Spend a few extra minutes opening closets, checking drawers, and looking under the bed again; you’ll be surprised how often something gets left behind.
Finish Strong Before You Leave
Once your inspection is complete, return your keys and access cards, complete any checkout requirements from your housing office, and confirm that everything has been signed off. Before heading home, take one final walk around your dorm room and any shared spaces to make sure you’ve collected everything. Saying goodbye to your dorm is exciting, but finishing the checkout process properly gives you one less thing to worry about after you leave campus. A few extra minutes now can save you from an unexpected trip back later.
7 Common Move-Out Mistakes to Avoid
Here are the most common slip-ups to steer clear of and what to do instead.
- Waiting Until the Last Minute: Packing the night before move-out day almost always leads to stress and forgotten items. Start early so you can pace yourself and deal with any surprises calmly. A simple checklist helps you stay on track and finish without rushing.
- Skipping the Cleaning Step: Leaving behind dust, trash, or wall marks can create a bad impression and result in fines or penalties. Take time to tidy your dorm before inspection and fix any minor damage.
- Overpacking Everything: Throwing your entire dorm into boxes only creates confusion later. Sort through your belongings and pack what you’ll actually need for next semester. Donate or sell the rest so you’re not hauling unnecessary stuff home.
- Forgetting to Label Boxes: Unlabeled boxes turn unpacking into frustrating guesswork. Label each one clearly with its content and destination. Also mark boxes with breakable items as “fragile” so that you handle them with care.
- Not Returning Dorm Keys on Time: Forgetting or losing your key can result in unnecessary fines. Check your checkout deadline and hand in your key during inspection. Keep a photo of the return slip as proof just in case.
- Leaving Trash or Donations Behind: Dumping items in hallways or common areas creates extra work for staff and can delay inspections. Dispose of trash properly and use designated donation bins around campus. A tidy exit shows respect for the next residents.
- Skipping Goodbyes: After packing, it’s tempting to rush off, but not saying goodbye can make things feel unfinished. Take a moment to thank your roommate, RA, or friends before heading out. It’s a small gesture that helps you close this chapter on a good note.
Make Your College Move-Out Day Easier with Plastic Moving Bins
Good planning is what separates a chaotic move-out day from a calm one. With a bit of organization, you can make a big difference and help yourself wrap up your semester without the stress. Your experience moving out of a college dorm depends on timing, preparation, and the quality of your moving supplies.
Start by gathering your boxes and packing materials early, labeling as you go, and setting aside essentials for your last night. Pay special attention to your moving supplies because cheap or flimsy ones could damage your belongings. The surest way to avoid this is to rent moving bins instead of buying or using free ones. You’ll get durable, uniform boxes that stack neatly, protect your belongings, and cost less in the long run.
This is where Stack Moves comes in. Our rental service offers sturdy, eco-friendly moving bins delivered to your door and picked up when you’re done. Book your Stack Moves bins today and make your college move simpler from start to finish.
Frequently Asked Questions
Moving out of college marks the end of one chapter and the start of another, so it’s natural to have a few lingering questions. We answered some common questions to help you make the transition a less stressful one.
Is It Hard to Move After College?
While moving after college can be challenging, it’s manageable with the right planning. The toughest part is often the emotional shift because you’re leaving behind friends, routines, and a familiar space. Just make sure you start early, sort your belongings before packing, get rid of what you don’t need, and label your boxes for easier unpacking.
What Are the Steps for Moving Out of a College Dorm?
The process starts with decluttering; decide what to keep, donate, or toss. Next, gather packing supplies like boxes, tape, and labels, and begin packing room by room to stay organized. Clean your dorm thoroughly to avoid penalties, and schedule your move-out time with your dorm office in advance. Finally, do a last walk-through to ensure nothing’s left behind before turning in your keys.
Where Can I Find Affordable Moving Boxes for College Dorm Moving?
You can find affordable moving boxes at local retailers like Walmart, Home Depot, and U-Haul, or online on Amazon and Facebook Marketplace. You can also get free boxes through campus forums or local community pages near the end of each semester. Keep in mind that quality can vary, so if you want a sturdier option without buying new ones, consider renting moving boxes.
How Can I Handle Sentimental Items During Move-Out?
Set aside sentimental items from your regular belongings so you can give them the special attention they deserve. Wrap fragile keepsakes like frames or ornaments in protective items like bubble wrap, and pack them in a small, sturdy box labeled “fragile” to keep them safe. You can also digitize letters, photos, or cards by scanning or photographing them. This will preserve the memories without taking up space and give you a way to keep them safe even if something happens to the originals.
What Are the Shipping Options Available for Out-of-State Students?
Out-of-state students can use courier services like UPS, FedEx, or USPS to ship boxes home or hire moving companies that specialize in student relocations. Some universities also partner with storage-and-shipping providers who handle pickup and delivery. Compare prices and timelines early to choose the most reliable and cost-effective option for your move.