index, follow Skip to main content
Skip to main content

Author: TJ Hennessy

TJ Hennessy leads Stack and is CEO of its parent company, Brick Dynamics. Before Stack, he spent more than four years as VP of Global Revenue at Bird. He was named to the Forbes 30 Under 30 list in 2017 and studied at the University of Southern California's Marshall School of Business.

How to Prepare for the College Move-In Day

If you’re heading to college soon and feeling unsure about what to bring or how to organize your belongings, you’ve come to the right place. By the time you’re done reading this guide, you’ll know exactly how to prepare for college move-in day. To get ready for college move-in day, start by reviewing your school’s move-in guide, gathering essentials early, and packing efficiently to make unloading simpler. This is where rentable plastic moving boxes come in.

At Stack Moves, we’ve helped students in the U.S. enjoy a smooth and stress-free college move-in day. With years of experience in the moving industry, we offer durable plastic moving boxes that make packing, loading, and unpacking easier from start to finish. Contact us today to rent your boxes and prepare for your college move-in day.

In this blog, we’ll share a step-by-step guide on how to prepare for college move-in day and a few pointers on what not to bring to campus.

An 11-Step Guide on How to Prepare for College Move-In Day

An 11-Step Guide on How to Prepare for College Move-In Day

These steps will help you stay organized, save time, and relieve yourself from stress during this big milestone of your freshman year.

1. Review Your College’s Move-In Guide

Before you start packing, take time to read through your college’s official move-in guide. You’ll usually find it on the school’s website. It includes important details about check-in times, parking areas, residence halls, and items not allowed in dorms. Some colleges also use their social media accounts to share links to campus resources like health services and safety offices to help new students settle in better.

2. Coordinate With Your Roommate Early

If possible, reach out to your roommate to decide who’s bringing what before move-in day. Share a list of what’s needed and who’s bringing it, so you don’t end up with duplicate items taking up valuable space. Similarly, you can discuss how to share closet space or organize common areas to keep your room functional and tidy. You can even agree on an arrival time so you can secure earlier time slots to avoid long lines during check-in.

This simple step can make the whole move-in process a lot easier for you and your roommate(s). It gives you a chance to break the ice and reduce those first-day nerves so that by the time you meet in person, it’ll feel like reconnecting with an old friend.

3. Pack Smart

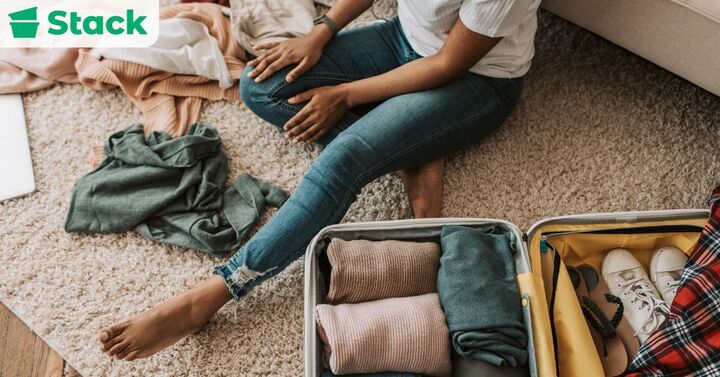
Instead of packing everything you own, focus on only bringing what you’ll need for your first year. You’ll thank yourself later when unpacking feels like a quick, easy win instead of an all-day workout.

The right way to pack your moving boxes is to always pack heavier items at the bottom of your box, while the lighter ones are on top to avoid crushing them. Also, group similar items together and use smaller boxes for heavier items like books. Everyday items and appliances are best suited for medium-sized boxes, and bulky but light items like your comforters go in large boxes.

4. Bring a Dorm Essentials Kit

This should include everything you’ll need to settle in comfortably on your first day. Trust us when we say the last thing you’d want after a long day of moving and unpacking is to look for your phone charger. Having an essentials kit saves you that hassle and boosts your confidence in how prepared you are for your first year in school.

Examples of items to include are a change of clothes, toiletries, phone chargers, medications, and important documents. Some campus resources may even recommend certain must-haves for new students, so check your college’s housing site or orientation guide for ideas.

5. Label Everything

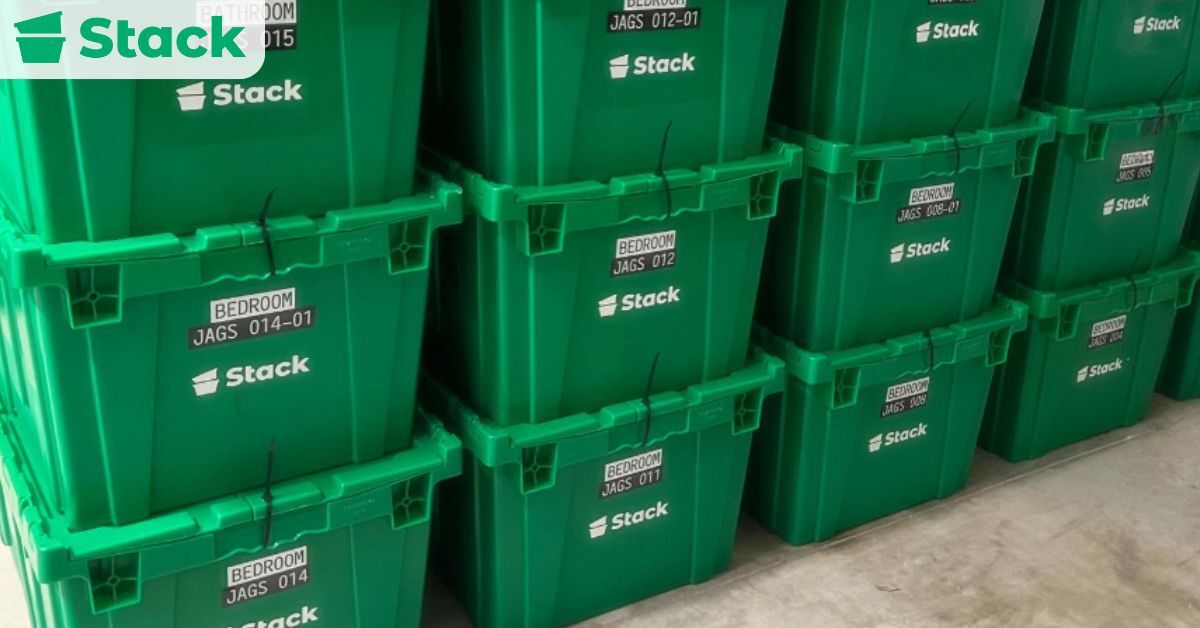
It might seem like an unnecessary extra step at first, but labeling your boxes can actually contribute to a smoother move, especially when done right. The correct way to label your boxes is to clearly write the content of the box and its destination on multiple sides. This method of labeling makes it easier to find what you’re looking for and speeds up the unpacking process. Alternatively, you can even color-code by category (clothes, toiletries, cleaning supplies, school supplies, etc.).

It’s also a good idea to write your room number and building name on each box in case something gets misplaced. This small step can prevent you from mixing up your things with those of someone else.

6. Keep Important Items With You
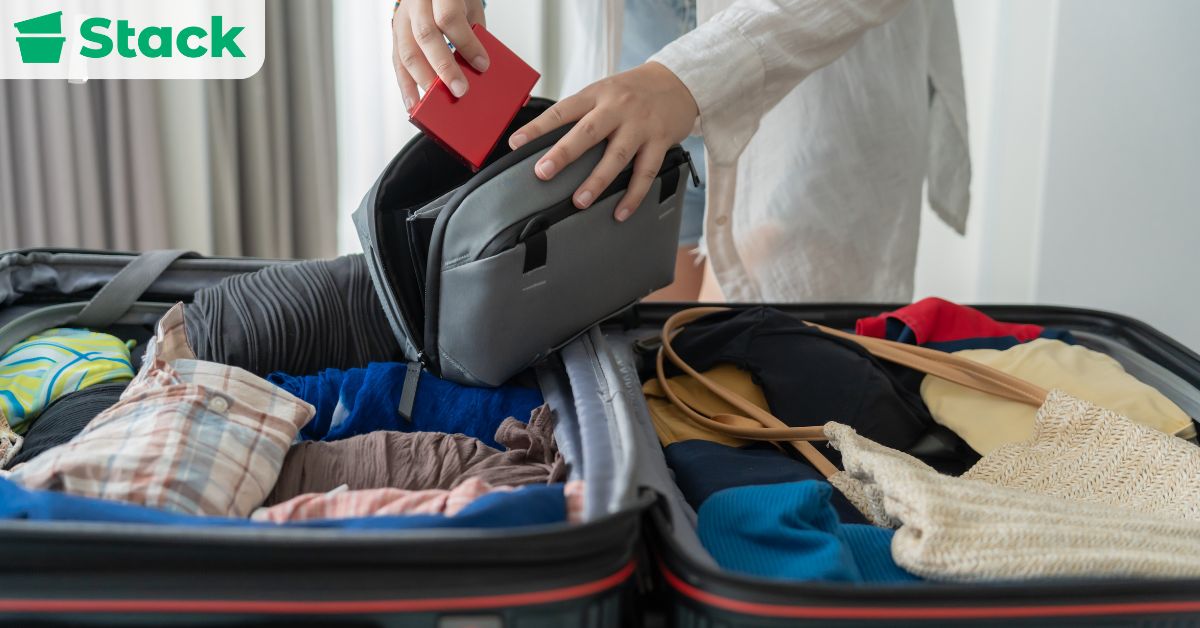
6. Keep Important Items With You

Keep a small bag or backpack for items you can’t afford to lose during move-in. This might include your student ID, keys, wallet, phone, charger, medications, and any important documents. You’ll save yourself the stress of a panic attack from rummaging through your boxes when you suddenly need them.

7. Plan Meals and Snacks

You may be tempted to skip meals or you might genuinely forget to eat something because of how busy you’ll be. Remember that you need food to keep your energy up and maintain a cheery mood through the day. Bring snacks, water, and maybe even a quick meal for yourself and anyone helping you.

The chances of you getting to explore the campus dining options right away are slim, so it’s best to prepare light meals that can keep you energized through the day. Once you’re settled, you can celebrate your successful move-in with a proper meal on or off campus.

8. Prep for Dorm Setup

Have a mental image of what your dorm room should look like before you move-in. Picture where you’ll place furniture, store clothes, and even hang family photos. If you can, check your school’s website for room measurements or photos of your residence halls to plan ahead. Having a comfortable setup right away makes it easier to relax and soak in the excitement of your first year on campus.

Carry paper towels and cleaning wipes to freshen up surfaces before unpacking. Most dorms may not allow nails. It’s best to come with as many command hooks and strips as you can to help you hang your decor, lights, and small organizers without damaging the walls.

9. Use Vertical Space in Your Dorm

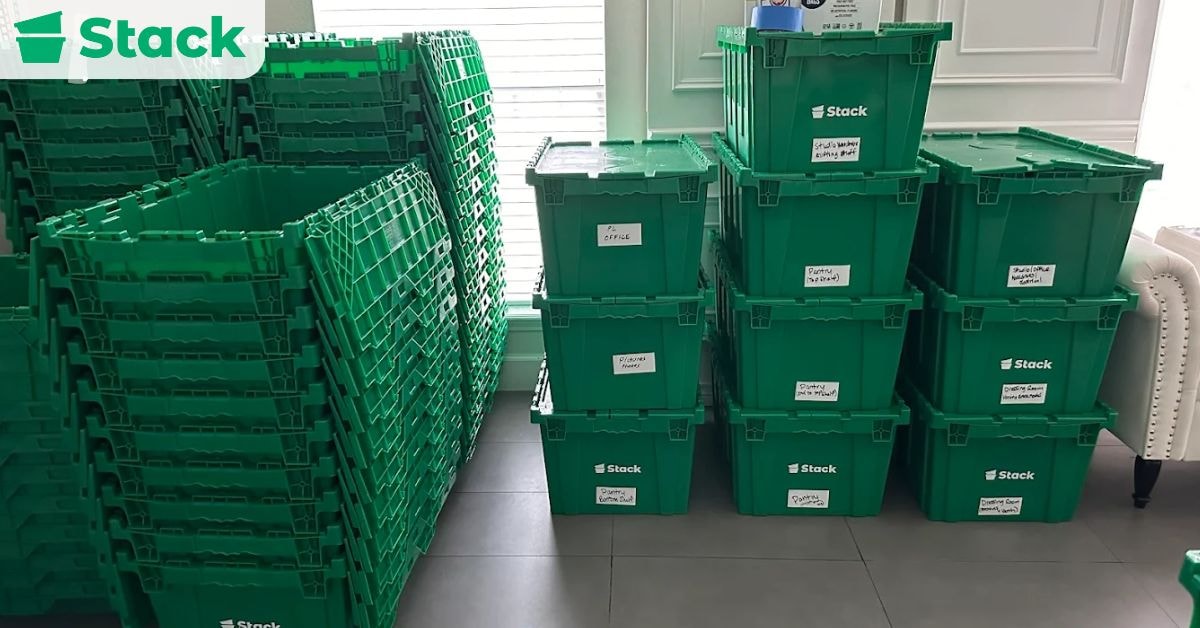
Despite their small size, dorm rooms can feel a lot bigger if you’re intentional about how you organize them. The best way to organize a dorm room is to take advantage of vertical space. This means keeping as much as you can off the floor. To achieve this, you’ll need shelves, hanging organizers, and wall racks. They’ll keep your space a lot more tidy and make daily life easier since you know exactly where everything is. Also, choose moving boxes that can be stacked on top of each other, as this is the best way to organize moving boxes during and after a move.

10. Minimize Stress

Moving day can be emotional, especially if it’s your first time living away from home. To keep calm, start the day early. Also prepare a moving checklist to help you stay organized and allow yourself to take breaks at intervals. The key is to pace yourself and enjoy the process instead of rushing through it.

Remind yourself that everyone is feeling just as nervous as you, even your family. Once you’ve settled in, try to keep your door open because it invites friendly faces. Most campuses offer relaxation or orientation activities for incoming students, so take advantage of those as well. Especially if you have plans of getting involved in clubs or student organizations early on.

11. Make the Move Memorable

College is the start of a whole new chapter. Take photos, laugh with your family, and let yourself feel the emotions of the moment. These memories will mean a lot when you look back on your first year of college. Take time to walk around and explore your new community. Say hello to neighbors or other students moving in because you never know who could become a lifelong friend.

How Long Does College Move-In Take?
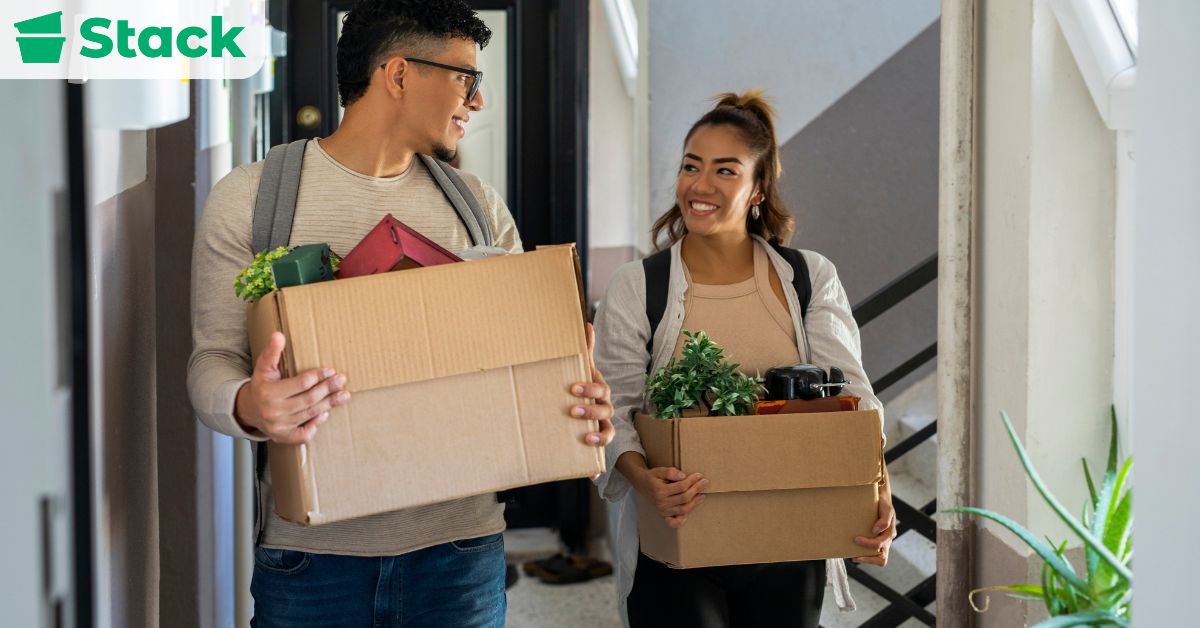
How Long Does College Move-In Take?

Most students take about 2 to 4 hours to unpack and set up their room. However, your total time can go up to a full day, depending on the number of belongings you bring. Simply put, the more you pack, the longer it’ll take to unload and organize. Plus, if you plan to decorate or rearrange furniture, expect to spend extra time setting up your space.

Another factor that could extend your total move-in time is logistics involving parking distance, elevator access, or even the building layout. For instance, if your dorm is a multi-story building and your room is on the top floor, it may take a while to get everything upstairs, even with an elevator.

You can ask your parents, friends, and family members to help you set up and cut down your move-in time. They’re usually happy to help because it gives them an opportunity to spend extra time with you before they say goodbye.

What Not to Bring to College (and Why)

What Not to Bring to College (and Why)

Avoid large appliances like toasters, hot plates, and air fryers. Most colleges won’t allow you to move-in with these for safety concerns, plus they’d only take up unnecessary space. Also, resist the urge to show up with bulky furniture such as full-sized dressers, because they won’t fit well in compact dorm rooms and can block movement.

Try not to come with duplicate items since they can quickly crowd your limited storage space. A short conversation with your roommate ahead of time can help you coordinate who’s bringing what and avoid unnecessary overlap. Leave seasonal clothing you won’t need right away; it can stay at home until you return for break.

There’s a higher chance for your belongings to get lost or damaged in shared spaces, so it’s best to leave expensive valuables or sentimental items. Finally, avoid bringing too many décor items, since your dorm will feel cozy with just a few personal touches and functional storage.

Feeling Ready for Your College Move-In Day?

While it’s okay to feel anxious about starting this new chapter of your life, remember that everyone’s figuring it out too. In college, you’ll meet new people who inspire you, learn new things, and create memories that you’ll remember for the rest of your life.

Since your entire college experience hinges on your first day, it is important for the move-in day to go smoothly. By staying organized during a college move, you help yourself save time, reduce stress, and settle into campus life smoothly.

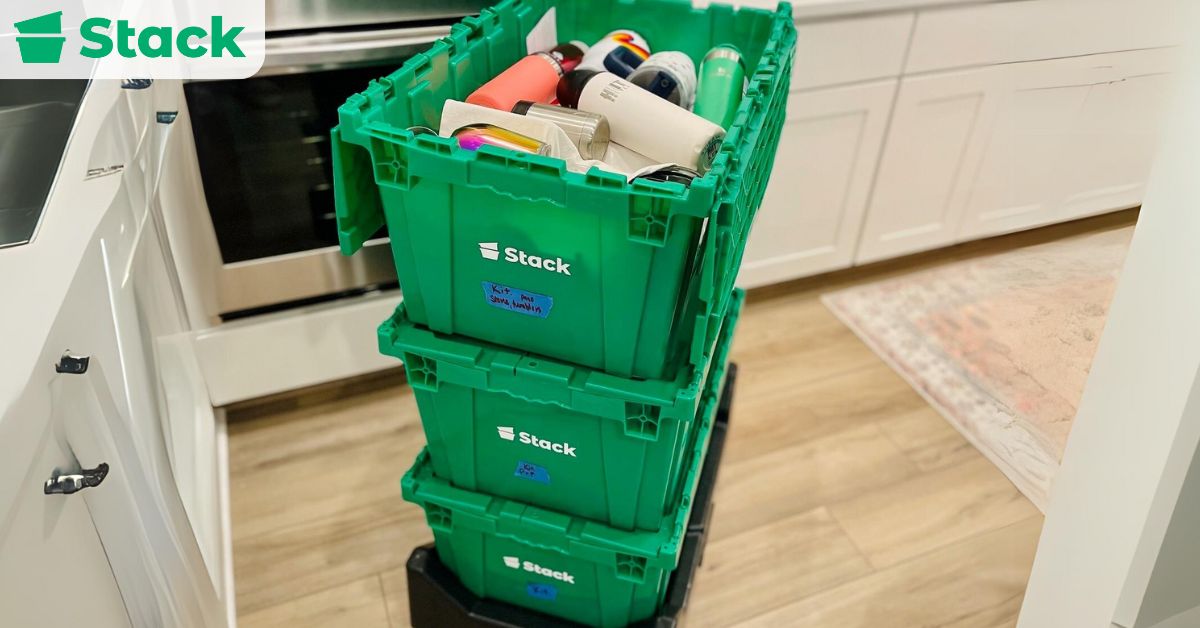
One foolproof way to stay on top of your college move is to rent plastic moving boxes instead of buying cardboard boxes. Our rentals include uniform boxes, labels, and dollies, so you can pack, move, and unpack without a hint of chaos.

Make your freshman move-in day effortless; book your moving boxes today and start your college journey stress-free!

FAQs

We’ve answered some of the most common concerns students have, so you can feel confident, prepared, and ready to start your freshman year strong.

What Should I Pack for College Move-In Day?

Pack essentials like clothes, toiletries, bedding, and dorm necessities first, along with practical extras like snacks, chargers, and cleaning supplies. Also pack first-night essentials in a separate, easily accessible bag. To stay organized and ensure nothing’s left behind, create a detailed packing list and check items off as you go.

How Early Should I Arrive for College Move-In Day?

You can arrive about 30 to 45 minutes earlier than the allocated time slot to stay ahead of check-in lines and parking rushes. This gives you extra time to unload your stuff, start unpacking without feeling rushed, and settle in before meeting your roommate or joining any move-in day activities.

What Are Some Items I Should Avoid Bringing to College on Move-In Day?

Skip bulky furniture, excessive decor, or appliances not allowed by dorm rules. Avoid packing things you rarely use, as dorms have limited space. Instead, focus on essentials and leave other items behind since you can always bring more later once you know what you truly need.

How Should I Label and Organize My Dorm Items for Move-In Day?

Label every box with your name, room number, and contents to stay organized. Pack things in reverse order, meaning items you’ll need first should go last into the car or box. Color-code categories like clothes or kitchen supplies to make unpacking easier and keep your stuff sorted from the start.
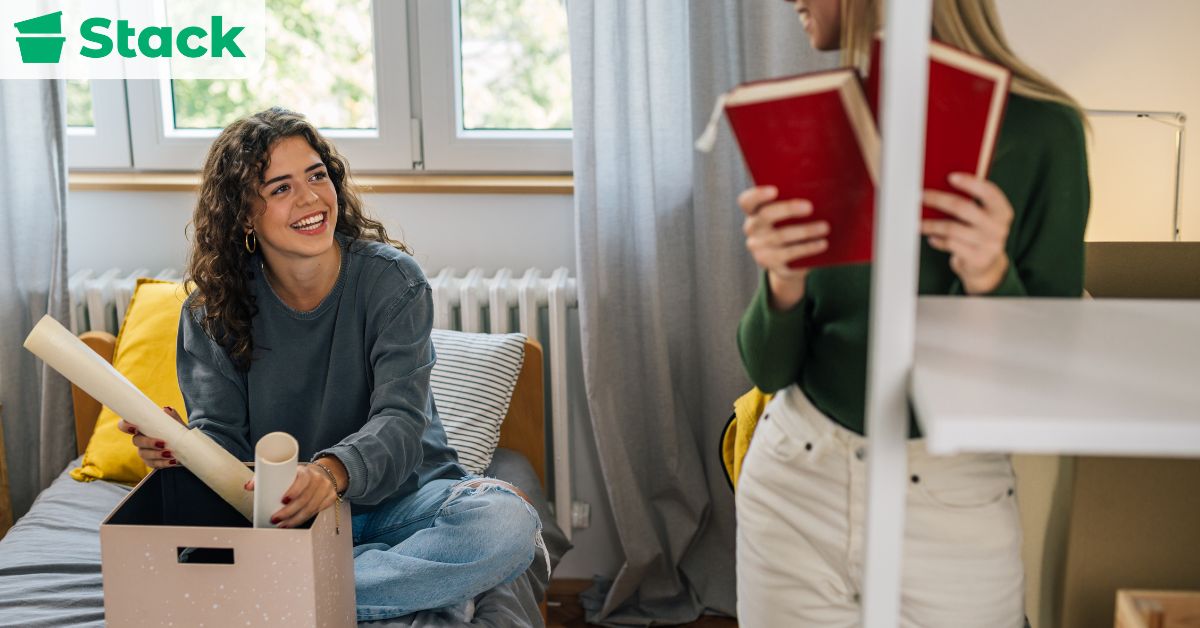
11 Tips for Moving Into a Dorm Room

Stepping into dorm life for the first time can feel like a big change. Between packing, planning, and saying goodbye, it’s easy to wonder where to even start. No need to worry, because this guide will walk you through everything you need to make move-in day smooth and stress-free. Our most important tips for moving into a dorm include planning your setup in advance, packing smartly, and using the right moving boxes to pack. Simple steps like creating a checklist, arriving on time, and planning with your roommates in advance are all you need to move in with confidence.

Stack Moves is a U.S.-based moving service that has helped hundreds of students enjoy stress-free moves. For years, our durable plastic moving bins have made dorm transitions easier by cutting down on clutter and protecting personal items during every move. Contact us today to reserve your bins and guarantee delivery before your college move-in day!

In this blog, we’ll share expert tips for moving into a dorm, along with some advice on how you can make the most out of your space.

11 Practical Tips for Moving Into a College Dorm

11 Practical Tips for Moving Into a College Dorm

Using these great tips will make the entire process faster and much less stressful for any college student.

1. Make a Dorm Move-In Checklist

Before you pack anything for your college move-in day, create a detailed moving checklist to help you stay on track. With a checklist, you’re guaranteed a more organized move from the start. Your checklist should include all the things you’d need to make your stay comfortable, such as toiletries, bedding, and school supplies.
Also, be sure to find out from your college what has already been provided for and what items are prohibited, as most colleges have rules about appliances and decor. You can either print out your checklist or use a digital app to tick things off as you go.

2. Coordinate With Your Roommate Ahead of Time

If possible, connect with your roommate before the big day to discuss shared items like a fridge or TV. The major benefit of doing this is that you’d save money on the cost of big purchases. Plus, you’ll also avoid bringing duplicate items and cluttering the limited space you have. Not to mention that good communication early on sets the tone for a positive roommate relationship.

Once you agree on what each person will bring, make a mini checklist for reference. Then talk about how you’d like to arrange your new dorm so setup is faster when you arrive. By sharing your style preferences, you can create a comfortable space you both enjoy.

3. Pack Smart and Stay Organized

You can save time, space, and stress by packing efficiently. For starters, instead of folding your clothes, roll them so you can fit more into your box. When packing bulky items like jackets or blankets, use vacuum-seal bags to shrink them down and make more room. Make sure to always group similar items together so unpacking is easier. Clearly label every box or bin so you know what’s inside at a glance. The correct way to label boxes is to write what’s inside the box and where it’s going on multiple sides.

4. Choose the Right Packing Containers

4. Choose the Right Packing Containers

The containers you choose for your move can make a big difference. Keep in mind that the best moving box not only keeps your items safe but also helps keep your move organized from start to finish.

Consider using plastic moving bins instead of traditional cardboard, since they are more sturdy. They offer better protection thanks to their enhanced durability, plus they’re a much more eco-friendly way to move. For smaller items like toiletries, cords, and desk supplies, you can use compact containers to keep everything neat and easy to find.

5. Set a Budget for Your Move

Don’t buy anything without planning your budget first. Setting spending limits for your move will help you prioritize what’s truly necessary for dorm life. Plus, it also lets you save money while still creating a comfortable space for yourself.

To create your moving budget, all you have to do is list every possible expense you think you’d incur as a result of the move. Examples of typical moving expenses include transportation, moving supplies, cleaning supplies, decor, etc.

Another way for college students to save money when planning for a move is to take advantage of student discounts or back-to-school sales. You can stretch your budget even more if you reuse certain home items instead of buying new ones.

6. Pack an Essentials Bag

Preparing an essentials bag is one of the smartest things you can do for move-in day. It should contain items you’ll need right away to make your first twenty-four hours comfortable, such as toiletries, bedding, chargers, snacks, and pajamas. Also include a change of clothes and any important documents, like your student ID or housing info, so they’re easily accessible.

An essentials box can prevent you from rummaging through multiple boxes after a long day of unpacking. Keep this bag separate from your other luggage so it doesn’t get buried during the move.

7. Arrive Early on Move-In Day

Many students don’t realize that simply by showing up on time, they gain an advantage. Starting early allows you to find parking faster, avoid long lines, and get a head start on setting up. Be sure to check the school’s move-in schedule and follow all parking or unloading rules. If possible, recruit a friend or family member to help speed up the process. Also, bring along a hand truck or rolling cart to make carrying heavy bins and boxes much easier.

8. Set Up Your Room Strategically

8. set up your room strategically

To instantly make your room feel more inviting, start with setting up your bed. Then clean surfaces like desks, dressers, and shelves before you unpack. Move through your room one area at a time, to avoid feeling overwhelmed.

9. Personalize and Decorate Your Space

Once the basics are in place, you can start directing your efforts to making your dorm feel like home. Creating a space that reflects your style helps you feel more relaxed and settled in your new environment. A few well-chosen accessories are all you need to make your dorm room feel cozy without cluttering it.

To start, add personal touches such as photos, posters, or string lights to give the room warmth and personality. Since many colleges don’t allow nails, use command hooks or strips to hang decorations safely. You can also incorporate functional décor like storage ottomans or wall shelves to combine style with practicality.

10. Keep Your Dorm Room Clean

Any space immediately feels more spacious and comfortable when it’s clean. Create a weekly cleaning schedule with your roommates to divide chores fairly and stay consistent. Even setting aside just 10 minutes each day for cleaning can help prevent big messes from building up. We recommend using over-the-door organizers and wall organizers to keep clutter off the floor and surfaces.

11. Adjust to Dorm Life

We understand that it’s going to take some time to settle into dorm life; fortunately, all it takes is an open mind to make the transition easier. Some things you can do to help you adjust quickly include taking time to get to know your roommates and neighbors. This small step can help you build a friendly, supportive atmosphere that feels like home. Make sure you respect shared spaces by keeping noise levels down and cleaning up after yourself.

It also helps to stick to a consistent sleep schedule to keep your energy and mood balanced. And don’t forget to establish a study routine early so you can stay focused even with the constant activity around you.

How to Maximize Space in a Small Dorm Room

how to maximize space in a small dorm room

Moving into a dorm often means having to adjust to a much smaller living space. Thankfully, this doesn’t automatically mean you have to feel cramped. With these organization hacks, you can make your dorm room feel bigger and easier to live in.

  • Use Under-Bed Storage: Take advantage of the space under your bed by storing clothes and shoes underneath. This frees up your floor and keeps less-used items neatly tucked away.
  • Go Vertical with Storage: To keep your room organized and more open, install shelves, tall bookcases, or stackable drawers to utilize every inch of wall space.
  • Try Over-the-Door Organizers: You can use your door for extra storage. Use over-the-door hooks, pocket organizers, or shoe racks to hold accessories, toiletries, or school supplies.
  • Pick Multi-Functional Furniture: Choose furniture that does two things at once. For example, a bed with drawers. This way you can save space while still keeping everything within reach.
  • Keep Your Closet Organized: Use slim hangers, hanging shelves, and dividers to fit more in your closet without creating clutter.
  • Declutter and Prioritize: Dorm rooms can get messy fast, so only keep what you truly need. Store seasonal or extra items at home or in a storage bin under the bed.
  • Use Hooks and Wall-Mounted Racks: For a clear and visually tidy room, use hooks and wall-mounted racks to hang your backpack, jacket, or headphones.
  • Use Rolling Carts or Bins: Portable carts or bins are great for small spaces because you can move them wherever needed and tuck them away when not in use.
  • Use Small Baskets or Containers: You can keep your shelves and desks neat without taking up too much space by using small containers to store small items like pens, chargers, and toiletries.
  • Choose Foldable or Collapsible Items: Opt for foldable chairs, hampers, or storage boxes that can be packed away when not in use.

Ready to Make Your College Dorm Move-In a Success?

Moving into a college dorm might seem overwhelming, but with some planning and organization, it can be a breeze. The right dorm move-in strategy helps you save time, maximize your space, and settle in comfortably from day one.

Some of the most useful tips for moving into a dorm are to budget your expenses, only pack what’s necessary, and coordinate with your roommate ahead of time. If you want to simplify your move even more, consider packing with plastic moving boxes. These boxes make packing, transporting, and unpacking a breeze. Each rental from Stack Moves includes stackable bins, labels, and dollies, so you can move in faster and stay organized.

Don’t let move-in chaos slow you down; book your plastic moving bins today and start your college experience with confidence!

FAQs

Moving into a dorm for the first time comes with lots of questions, from what to pack to how to make your space feel like home. These FAQs address your concerns to help you move in easier, stay organized, and settle comfortably into dorm life.

What to Do on the First Day in a Dorm?

Start unpacking right away to make the space feel like yours. Introduce yourself to roommates, organize essentials, and check for any maintenance issues. Label your desk drawer and hang a few decorations to settle in faster.

How to Prepare for Living in a Dorm?

Preparation starts before college move-in day; bring only what you’ll use daily. Most colleges provide lists of what’s allowed, so review them carefully. Remember, safety matters; avoid overloading outlets or using anything that could be a fire hazard.

What Are Some Essential Items to Bring When Moving Into a Dorm?

Some essential items to bring when moving into a dorm include bedding, toiletries, school supplies, and cleaning supplies. Don’t forget organizers for your desk drawer and closet to keep your space tidy.

How Can I Emotionally Prepare for Moving Into a Dorm and Leaving Home for College?

It’s normal for a college kid to feel nervous leaving home, but remind yourself this is an exciting step toward independence and personal growth. Stay connected with family, but also focus on new friendships and activities on campus.

What Should I Pack for Move-in Day to Ensure a Smooth Transition?

To make move-in easier, organize items by category and pack fragile things last. Put a trash bag over your hanging clothes to move them wrinkle-free, and label boxes clearly with their content. Keep snacks handy so you can stay energized and focused while unpacking.

How Can I Stay Organized in My Dorm Room?

Use stackable drawers and command hooks to save space. Keep frequently used items easily accessible, and make your desk drawer your productivity hub. These great tips help keep clutter under control and your room feeling like a calm, functional space.

What Are the Best Tips for Sharing a Dorm Room?

Respect is key. Have a discussion around quiet hours, cleaning schedules, and shared spaces early. Use headphones for calls or music, and set clear expectations for guests. It’s important to remain considerate to ensure a smooth roommate experience.

How to Move a College Student Across the Country

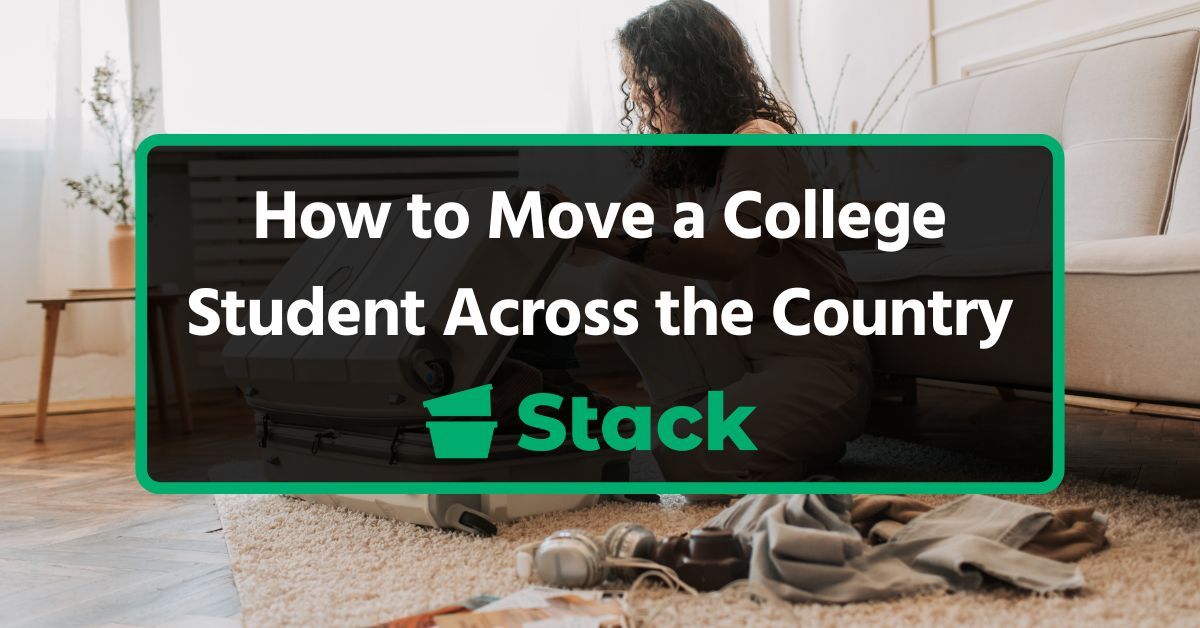
Planning a cross-country move for your child can feel overwhelming, especially when you’re trying to figure out how to keep it organized. The good news is that with some careful planning, you can make the entire process hassle-free for both you and your student.

To move a college student across the country successfully, start by budgeting and creating a moving timeline, arranging transportation, and securely packing their belongings. For maximum protection, consider using plastic bins to pack your belongings.

At Stack Moves, we’ve helped families and students enjoy stress-free long-distance moves nationwide. With years of experience in the moving industry, we offer reliable moving solutions and durable plastic moving boxes that make packing and unloading easier every step of the way. Contact us today to rent your boxes and make your cross-country college move simple and organized.

By the end of this guide, you’ll know how to coordinate a move across the country so your student arrives at campus ready to start their next chapter.

How to Move a College Student Across the Country

How to Move a College Student Across the Country

As a parent or guardian, your role is to make sure your student’s move goes smoothly. With our clear step-by-step guide, you can help your college student start the school year with zero stress.

Plan Ahead and Set a Budget

By preparing early, you can make smarter decisions about how much stuff should go with your student and what can stay in storage. Start planning your cross-country move at least 8–12 weeks in advance to avoid any last-minute stress. Your moving timeline should cover each step, from packing to arrival day. To stay organized, make a moving checklist of everything your student might need.

Try to set a realistic budget that includes all major moving expenses, such as truck rental or professional movers, shipping fees, and travel expenses like flights, gas, or meals. Do not forget to include college-related costs such as dorm room supplies, too. It’s also a good idea to keep a small emergency fund for unexpected expenses that might come up during the move.

Arrange Transportation

Once you’ve set your budget, the next step is to choose how you’ll get everything and everyone across the country. Decide early whether you will rent a moving truck, hire professional movers, or use a secure storage service to ship items. Plan the student’s personal travel too, whether that means booking a flight or planning a road trip.

It’s best to set a date with your transportation provider as soon as you can because it saves money and ensures everything arrives on time. If you’re planning to drive yourself, map out rest stops and overnight stays for comfort and safety.

Declutter and Organize Belongings

Declutter and Organize Belongings

Before packing, assist your students in deciding what truly needs to make the trip. Categorize items in keep, donate, or sell piles and encourage your student to part with things they no longer use. This simple step makes it easier to figure out how much stuff they need to move and can save money on moving services or shipping.

To keep your things organized and speed up unpacking, clearly label your boxes. The best way to label your moving boxes is to write down the contents and destination of each box on multiple sides. Alternatively, you can also color-code your boxes to guide movers on what goes where, further shortening unloading time.

Gather Moving Supplies

Gather all the supplies you’ll need in advance. This includes moving boxes, packing tape, bubble wrap, and markers for labeling, to name a few. We also advise most movers to consider renting plastic moving boxes instead of using cardboard boxes. Plastic bins are more durable, protect belongings better during long-distance travel, and save time since there’s no assembly or tape required.

Pack Strategically

Proper packing reduces the risk of lost or damaged items and helps your child feel comfortable and prepared in their new space. The right way to pack your box is to place heavy items at the bottom of each box and lighter ones on top to prevent damage during transit. Bulkier items like comforters should be packed last and in large or extra-large boxes since they take up a lot of space. Protect fragile items, electronics, and important documents with bubble wrap or soft clothing as a substitute.

Make sure you prepare an essentials bag that contains everything your child will need to comfortably settle in on their first day on campus. Items like toiletries, chargers, medications, and a few days’ worth of clothes are examples of what should go in your essentials bag. Additionally, important documents, like IDs, transcripts, and payment receipts, should be kept in a secure folder that travels with the student.

Coordinate With the College

Coordinate With the College

Before move-in day, reach out to the college to confirm move-in dates, policies, and dorm check-in procedures. Some colleges have scheduled time slots or designated unloading areas, and having this information handy can save stress and prevent delays. Do not shy away from asking if the school offers moving assistance, storage options, or rental equipment to make the process easier. If possible, review the dorm layouts or photos to plan where furniture and belongings will go.

Unpack and Settle In

When you arrive, unpack essential items first, such as your bedding, bathroom supplies, and kitchen necessities. Do not feel under pressure to set up everything at once; instead, take time to set up the room in a way that feels comfortable and functional. Explore the campus together to find key areas such as dining halls, libraries, and student services.

Reduce Stress During the Move

Prepare snacks, drinks, and meals for travel time to keep everyone energized. Plan for breaks and allow extra time to handle unexpected events that can happen during a busy move-in weekend. Keeping stress levels down helps both you and your student stay focused and make better decisions during the move. You also get to enjoy a more positive experience, allowing your child to start college feeling confident and supported.

Simple Ways to Reduce Stress and Save Money on Your College Move

Simple Ways to Reduce Stress and Save Money on Your College Move

These simple strategies will help you save money while keeping stress levels under control as you plan for your move.

  • Set a realistic budget: List all expected expenses, including transportation, packing supplies, travel, and meals. Track spending to make sure you stay on target and avoid surprises.
  • Compare moving options: Get quotes from multiple moving companies to find the best fit for your needs. Comparing options ahead of time saves money and prevents last-minute headaches.
  • Rent reusable moving boxes: Reusable plastic moving bins are sturdier and more eco-friendly than cardboard. They protect your child’s belongings better and make packing and unpacking faster.
  • Ship items directly to college: Consider ordering dorm essentials online and shipping them to campus. This way, you can save space in your moving truck or car and reduce the amount of stuff you need to carry during travel.
  • Ask for student discounts: Many moving, storage, and transportation services offer special student rates. Taking advantage of these can lower overall costs and make the move more affordable.
  • Use checklists and apps for organization: You can avoid any last-minute stress and ensure nothing important gets left behind by keeping track of tasks with a checklist.
  • Meal prep for travel days: Pack snacks, water, and simple meals for the journey to keep energy levels up. Having food ready reduces stress and keeps both you and your child focused on the move.
  • Provide emotional support: Supporting their emotional needs helps them adjust to the new college dorm or apartment more smoothly.

Ready to Move Your Student Across the Country?

It’s natural to feel stressed about moving your child across the country. But with careful planning, a clear timeline, and organized packing, you can ensure your child’s belongings arrive safely and that the move-in weekend goes smoothly.

One cost-effective way to stay organized is to rent plastic moving boxes for your move. These boxes are reusable, easy to transport, and make the entire moving process faster and more secure. Reserve your moving boxes and set your student up for a smooth start.

Frequently Asked Questions

This FAQ section answers the common concerns parents have to help make the process smoother and less stressful.

How to Move Stuff Across the Country for College?

Start by creating a detailed plan that includes packing, decluttering, and arranging transportation for your child’s belongings. Organizing early and labeling everything clearly ensures the student’s dorm room or apartment is ready for their trip and reduces stress for both of you.

What Is the Best Transportation for College Students?

For large shipments, moving pods or professional movers are reliable, while the student can fly, drive, or take a bus depending on travel time and convenience. Coordinating the students’ personal travel with the arrival of their belongings helps ensure a smooth move and a comfortable start to the school year.

How Much Does It Cost to Move Belongings Across the Country?

The cost of moving a college student across the country can range from around $1,000 to $10,000. The final cost depends on factors like the distance, the amount of belongings, and whether you hire professional movers or use a DIY method.

What Are the Cheapest Ways to Move a College Student Across the Country?

Cost-saving strategies include renting a truck and moving belongings yourself, using shipping or moving pods for heavier items, and decluttering. Parents can take advantage of student discounts on moving, storage, and travel services and ship dorm essentials directly to campus. These methods reduce travel time, stress, and overall costs while keeping the student’s items safe.

How Far in Advance Should I Plan to Move a College Student Across the Country?

Planning should begin at least 8–12 weeks before move-in weekend. This gives enough time to create a budget, book movers or trucks, gather supplies, declutter, and coordinate the student’s travel. Early preparation reduces stress, prevents last-minute problems, and ensures the dorm room or apartment is ready for the school year.

What Are the Benefits of Using Dorm Moving Services for Moving a College Student Across the Country?

Dorm moving services provide professional packing, secure transportation, and sometimes storage options for seasonal items. Parents and guardians can save time and reduce stress knowing belongings will arrive safely for move-in weekend. These services help students settle in faster and ensure essential items like bedding, clothing, and laundry detergent are ready when the school year begins.

How Can College Students Find Community Before Arrival in Their New Location?

They can join online groups or forums for other students attending the same university. They should also take part in campus orientation programs and connect with their roommates. Early connections help the student feel more comfortable and supported, making the transition to college life smoother and less overwhelming.

Medical Office Relocation Checklist Template

Download Medical Office Relocation Checklist

Relocating a medical office is a lot more complex than a standard business move. In addition to the usual logistics, healthcare facilities also have to account for patient safety, how they dispose of their waste, HIPAA-compliant data handling, among other things.

It all goes to show how the smallest oversight can lead to serious consequences. With a comprehensive moving checklist, you can allocate resources efficiently and avoid making any costly mistakes.

For this kind of high-stakes move, you can rent sturdy plastic moving crates from Stack Moves, which offer more protection than traditional cardboard. Backed by years of experience supporting corporate relocations across the US, our durable crates help keep sensitive equipment and files secure throughout the process. Rent your crates today and make your medical office move smoother from start to finish.

In this post, we will walk you through how to plan for your medical office move with a detailed medical office relocation checklist. We will cover everything from early planning and compliance to IT setup and post-move operations. Use this as a roadmap to ensure your relocation process is smooth, compliant, and stress-free.

Why You Need a Medical Office Relocation Checklist

Why You Need a Medical Office Relocation Checklist

Relocating a medical office involves complex legal, operational, and logistical requirements. A clear and detailed office moving checklist can help you stay organized, minimize disruptions, and ensure nothing critical gets missed along the way.

The first reason to create a medical office relocation checklist is that you’re dealing with more than just boxes. The requirements that apply to a medical office during a move are different from those of other businesses. They are regulated by multiple agencies and need to remain compliant every step of the move, or else they could face serious penalties such as losing their license.

The second reason to plan your move with a checklist is that there’s a risk of HIPAA violations or patient care gaps. Relocating improperly could put patient data at risk. If such an incident happens at any point during the move, it could lead to HIPAA violations and heavy fines. There’s also the risk of missed appointments or service interruptions, which can erode patient trust and harm your reputation.

Additionally, without a checklist, it would not be easy to get everyone on the same page. One of the great things about working with a checklist is that it clearly communicates everyone’s roles. Plus, vendors can be scheduled properly, and patients can receive timely updates about your new address.

Medical Office Relocation Plan for Beginners

This beginner-friendly plan breaks down the process step by step so your move stays organized, secure, and on schedule.

Pre-Planning Stage (6–12 Months Before Move Date)

Pre-Planning Stage (6–12 Months Before Move Date)

The success of your move is determined long before any box is packed. Understand that the decisions you make during this phase will shape the entire relocation. And so this stage is all about building a strong foundation by getting organized, aligning stakeholders, and setting expectations.

Begin by notifying all key stakeholders of your intent to relocate. Clear and early communication ensures everyone is on the same page and allows time to coordinate responsibilities. Next, set a realistic relocation budget that accounts for moving expenses, downtime, equipment upgrades, and any unexpected costs that may arise.

It’s also crucial to assign a dedicated project manager or build a small relocation team. This group will be responsible for overseeing everything concerning the move. This includes timelines, tasks, and being a point of contact for vendors and internal teams.

Once your leadership structure is in place, start researching potential new office locations that support your operational needs, meet zoning regulations, and offer easy access for patients and staff. You can also start searching for trusted professionals for the move itself.

To tie it all together, review your current lease agreement and determine your required notice period or any penalties. This is also a good time to initiate your compliance planning, such as certifications needed for your new facility.

Compliance and Communication (3-6 Months Before Move Date)

During this stage, focus on meeting all regulatory requirements and keeping all key stakeholders in the loop of what’s happening. Begin by updating your address with all relevant regulatory and administrative bodies, including:

  • Your state’s medical board
  • Drug Enforcement Administration (DEA)
  • Centers for Medicare & Medicaid Services (CMS) and all insurance payers
  • Any applicable state licensing authorities

Failing to notify any of these organizations could violate legal standards. Plan for possible inspection appointments, site approvals, or credential re-verifications, especially if your move involves controlled substances or changes to your service offerings.

Keep in mind that compliance-related tasks often move slowly, so allocate extra time into your planning process. So if your new office location requires local occupancy permits, zoning clearance, or business registrations, start the process early to avoid last-minute delays.

Equipment, IT, and Layout Coordination (1–3 Months Before the Move)

Any successful move requires early coordination of your equipment, IT infrastructure, and new office layout. This is especially true for medical facilities because of how heavily they rely on tech. Use this time to assess your current setup and ensure your new office location can support the same functionality.

Start by notifying your IT provider or in-house team well in advance. You want them to have enough time to create a transition plan for transferring your office IT services, such as internet service, phone lines, internal servers, and cloud-based platforms.

Next, schedule a secure backup of all patient data and essential files. This protects you in case anything gets lost or damaged in transit. Before you reopen your medical facility, test all critical systems to confirm everything works smoothly. This will allow you to troubleshoot in advance and reduce downtime.

To wrap things up, finalize your new office layout and confirm all tech-related installations meet your workflow needs.

Packing and Labeling (2-4 Weeks Before Move Date)

Packing and Labeling (2-4 Weeks Before Move Date)

The goal of everything done during this phase is to ensure that your items arrive safely and that they can be unpacked quickly at the new facility. Using labels to organize your move can be a game-changer. With a color-coded labeling system or room-based tags, you can indicate where each box should go in the new space.

For a more efficient packing experience, consider renting plastic moving bins instead of buying cardboard boxes. These containers are not just sturdier but also more eco-friendly. Pack sensitive medical equipment using foam-lined containers or custom padding to prevent costly damage.

Heavy items should go in smaller boxes to reduce the risk of someone getting hurt from lifting them. Be sure to clearly label each box with its contents and the appropriate department so staff can find what they need quickly at the new office.

For any hazardous materials, follow all safety regulations for separation and secure transport. Confidential patient records should be packed in tamper-evident containers to maintain compliance with HIPAA and ensure privacy throughout the move.

Pack essential supplies last so they’re the first to be unpacked at your new location. Items like PPE, prescription pads, or daily-use instruments should be immediately accessible once operations resume.

Final Preparation (1 Week Before Move Date)

In the final week leading up to your medical office move, your focus should shift to execution. By now, you should’ve packed all non-essential items and labeled every box with its content and destination. Doing this helps to avoid any confusion on move day and speeds up the unpacking process. You can even use color-coded labels or numbers to match your floor plan, so movers and staff can easily place items where they belong in the new office.

Next, confirm all vendor appointments, moving times, and access instructions. This means getting in touch with any vendor responsible for medical waste disposal, specialized equipment, or installations. Make sure everyone has the right address, entry times, parking instructions, and contact persons. Miscommunication at this stage could cause delays or missed services on move day.

Set up mail forwarding with the postal service and transfer your utility accounts to your new office location. As a final step, prepare signage and entry instructions for both staff and patients at the new space.

Your company address should be up to date on all printed forms, digital listings, and even insurance portals. Even a temporary sign will be useful in directing patients and vendors where to go during the first week.

Move Day

This is a busy day for everyone, so it’s important to have a clear plan for how it should go. Assign staff members to supervise both the current and new office locations. The point of doing your part is to have someone on-site who can answer questions, provide access, and direct the movers as needed. It also minimizes confusion and helps catch any last-minute issues that might arise on either end of the move.

As items are being moved from your current office to the new one, secure all sensitive materials and medical equipment. This includes protected health information (PHI), controlled substances, and any diagnostic devices like an X-ray scanner. Be sure to pack, label, and move them according to the relevant safety and legal standards.

Upon arrival, inspect everything for damage. It’s best to start with your most valuable and fragile equipment before moving on to furniture and supplies. Use your office relocation checklist to confirm all items have arrived and are placed in the correct rooms. Address any issues right away with your movers.

Finally, distribute keys, access cards, alarm codes, and update your security system. Confirm that all staff members know how to enter and exit the new facility safely. Also, be sure that all security protocols are in place before you leave. You want to be sure that your office, equipment, and information are safe from day one.

Final Setup (First Week After Move Date)

Final Setup (First Week After Move Date)

Once your office is fully relocated, your first line of action should be to make sure that all systems are operational within the first 24 hours. Test your phones, internet connections, appointment software, EMRs, and internal communication tools. Even minor issues, such as a voicemail not routing correctly, can have a big impact on the patient experience.

After confirming that your core systems are up, gather your team for a brief walkthrough of the new office space. Even if everyone helped during the move, an orientation can help clarify workflow, emergency exits, and process changes. This is also a good time to remind staff of any newly implemented protocols related to the new space, such as how to use upgraded equipment or access updated digital tools.

Next on your list should be to verify that all professional licenses, billing systems, and patient forms reflect your new office address. Any inaccuracies can lead to insurance claim denials, reimbursement delays, and compliance concerns.

Lastly, send a follow-up message to your patients to confirm the move was successful. Mention your new office address, your business hours, and how they can reach you. This is also a good time to thank them for their patience during the move.

Want to Rent Reusable Bins and Cut Moving Costs?

To guarantee a successful transition, you need to create a detailed budget, set clear timelines for each task, and organize your team. The best way to accomplish this is with a comprehensive checklist. A relocation checklist won’t just help you prevent costly mistakes; it can also help you minimize possible disruptions.

Remember to start planning early, at least a year before your intended move date. Assign responsibilities to staff members and allow time for any necessary renovations or permit delays. After moving in, don’t overlook your post-move assessment.

And don’t forget that your assets are far too valuable to be packed in flimsy moving containers. Instead, opt for reusable plastic moving boxes offered by rental companies like Stack Moves. They’re strong, secure, and stackable, making them perfect for protecting sensitive equipment and confidential records in a high-stakes healthcare environment. Ready to simplify your move? Rent a moving bin today!

Frequently Asked Questions

There are many parts to planning a medical move, literally and figuratively. These FAQs address common concerns that medical practices face when preparing for a smooth and compliant move.

How Far in Advance Should I Start Planning My Medical Office Move?

Ideally, planning should begin 9-12 months before your intended move date. This gives you time to get everything set. You can notify your patients, secure necessary permits, and book a professional moving company experienced in medical facility relocations.

What Packing Materials Are Recommended for Fragile Medical Instruments?

Firstly, make sure you consult professional movers who specialize in medical office relocations to ensure proper handling and transport of your devices. That said, sensitive equipment should be packed with high-quality materials such as foam inserts, anti-static bubble wrap, and hard-shell crates. Avoid using standard boxes or cheap fillers, as they won’t protect against damage or shifting in transit.

What Items Should Be Prioritized for Packing First in a Medical Office Move?

Start by packing non-essential items such as archived records, excess office furniture, and seasonal supplies. Gradually move toward less frequently used medical equipment and office décor. Leave essential tools and patient care equipment until the very end to avoid interruptions to your daily operations.

Can I Customize the Medical Office Relocation Template for My Practice?

Absolutely. Just like every business is different, every medical practice has its unique business needs. Your relocation checklist should be tailored to what happens in your business. This will help you allocate your resources more efficiently.

Best Size Boxes for Moving

When preparing for a move, it’s important to choose the right box sizes because if your box is too big or too small, your belongings could shift, break, or be difficult to carry. The best-sized boxes for moving are usually a mix of small, medium, and large boxes. In some cases, you may also need a specialty box, especially if you’re packing fragile or oddly shaped items.

At Stack Moves, we’ve helped thousands of renters simplify their moves with our durable, eco-friendly moving bins. With years of experience in the moving industry, our team knows exactly what you need to find the best-sized boxes for moving without any of the guesswork. Rent our reusable moving boxes today for a cleaner, faster, and more organized move.

In this blog, we’ll break down which box sizes work best for common household items. We’ll also guide you on where to source the right moving boxes and share practical packing tips to make your move seamless from start to finish.

Standard Moving Box Sizes

Standard Moving Box Sizes

When planning a move, choosing the right box sizes is necessary for a hassle-free experience. To help you safely pack and transport your belongings, we’ve explained how different sizes cater to various items.

Small Moving Boxes

Best for: Heavy or compact items

Ideally, a small box is perfect for items like books, DVDs, and canned goods. They are typically 16” x 12” x 12″ and can safely carry up to 40 pounds. When using these boxes, avoid overloading them. Instead, use packing paper to fill empty spaces and protect the contents of the box. It is important to ensure that the box remains easy to lift.

Medium Moving Boxes

Best for: Everyday household items

Medium-sized boxes are usually around 8″ x 14″ x 12″ with a capacity to hold up to 60 pounds. You can use these boxes to pack kitchenware, toys, and decorative items. For these medium-sized boxes, place heavier items at the bottom and lighter items on top. Furthermore, use packing paper or bubble wrap for protection and to prevent items from shifting.

Large and Extra-Large Moving Boxes

Best for: Light but bulky items

These boxes are suitable for bulky but light items like linens, comforters, and pillows. The common dimensions for these boxes are 20″ x 20″ x 15″ or 23″ x 23″ x 16″, and they are capable of holding up to 80 pounds. Despite their size, you should avoid the temptation to overpack them. It can make the boxes too heavy and susceptible to tearing.

Specialty Moving Boxes

Best for: Fragile, valuable, or oddly shaped items

While most items will fit neatly into your standard moving boxes, some belongings need extra protection or special handling. These unique items call for specialty moving boxes. Specialty boxes are specifically designed to keep fragile or irregularly shaped objects safe during transport.

Wardrobe boxes, dish pack boxes, and mirror and art boxes are common examples. These boxes feature reinforced walls, inserts, or adjustable designs that provide added stability and protection. Although they are pricier than your standard-sized boxes, the added safety and convenience they offer make them well worth the investment.

Best Box Sizes for Moving Each Type of Household Item

Best Box Sizes for Moving Each Type of Household Item

Here’s our quick guide to help you match the right box size to your belongings:

Small Boxes Medium Boxes Large Boxes Specialty Boxes
Books Pots, pans, and kitchen utensils Suits, dresses, and coats Flat-screen TVs
Tools and hardware Dishes, bowls, and cups Bed linens and duvets Computers and monitors
Pantry items (cans, jars, condiments) Toys and board games Shoes and handbags Dishware and glass sets (dish pack boxes)
Small kitchen appliances (toaster, blender) Personal care appliances (hairdryer, shaver) Accessories and belts Artwork and picture frames
Cleaning supplies Small decorative items Blankets and throws Musical instruments
Office supplies and stationery Pantry staples like cereal boxes Seasonal wear Mirrors
Small electronics and cords Towels and bathrobes Wine or liquor bottles
Bathroom items (lotions, toiletries) Collectibles and antiques
DVDs, CDs, and video games Electronics and gaming consoles
Decor accents or framed photos Lamps and fragile decor

Where to Find the Best Box Size for Moving

Your budget and the nature of your move play a big role in where you get your moving boxes. If you’re on a tight budget, you can get moving boxes for free from local grocery stores, liquor shops, or community listings on Craigslist and Facebook Marketplace. These can be a fantastic way to save money, but the downside is that free boxes often come in mixed sizes and conditions. You’ll need to inspect them carefully for tears, dampness, or signs of wear before packing.

If you’d rather buy, you can still find cheap moving boxes by purchasing in bulk from major retailers like Home Depot and Lowe’s. Buying in sets is often more affordable than picking up individual boxes. You’ll get better quality than free boxes, but you’ll also have to figure out what to do with the boxes after your move.

What if you’d rather source boxes from your moving company? Some moving companies provide boxes and supplies as part of their service, though this convenience usually comes at a higher cost. It’s a good option if you’re short on time or prefer not to deal with packing materials yourself.

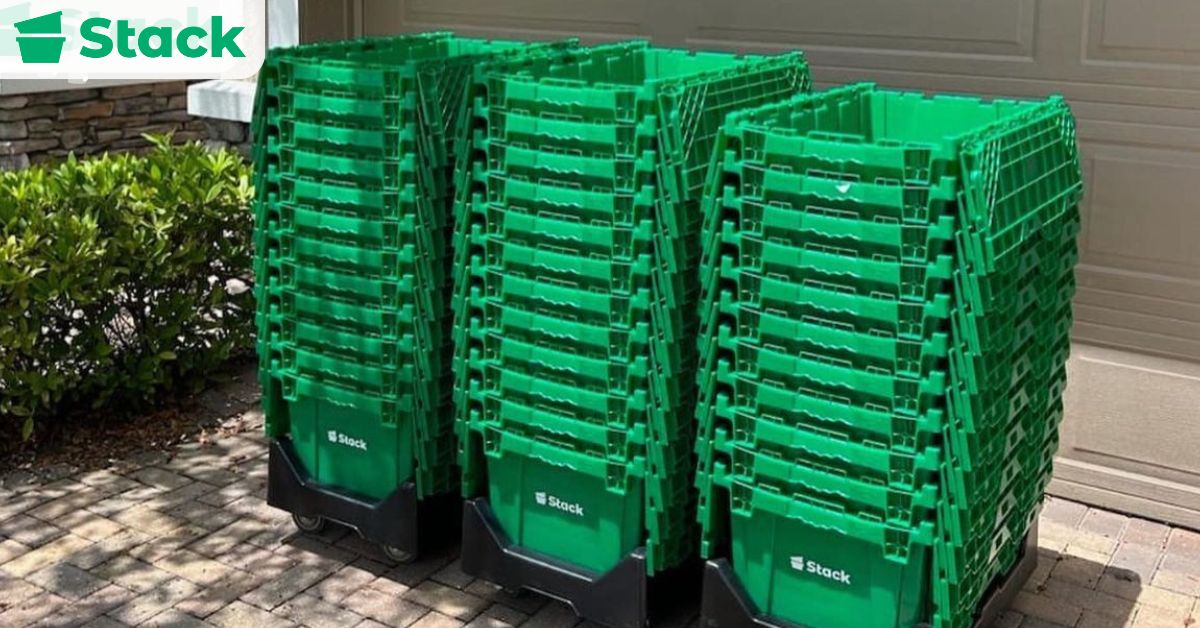
But if you’re looking for a balance between cost, convenience, and sustainability, renting moving boxes might be your best bet. With this option, you’ll get durable, reusable bins delivered right to your doorstep. And the best part? They’re collected once you’re done with your move, leaving you with no waste or clutter.

Factors to Consider When Choosing Box Sizes

Factors to Consider When Choosing Box Sizes

Here are the key factors to keep in mind when deciding how to pack or what type of moving container to use:

  • Item Size and Volume: Your belongings should fit comfortably inside the box or bin with minimal empty space. Smaller boxes work best for compact but dense items like books, while larger boxes should be reserved for lightweight or bulky items such as bedding. Using appropriately sized boxes prevents wasted space and reduces the risk of damage from shifting items.
  • Weight Distribution: The weight of your belongings should also be considered. Heavy items should go in smaller boxes to make lifting easier and to prevent the bottom from giving out. Lighter items can be placed in larger boxes to balance overall weight.
  • Fragility of Items: Fragile items like dishes, glassware, or electronics need boxes that provide enough room for cushioning materials such as bubble wrap or packing paper. Avoid overpacking fragile boxes to reduce pressure and the risk of cracks or breakage.
  • Type of Belongings: You need to adopt a different packing approach for each household item. For instance, clothes can go into boxes or bags but delicate items like artwork should only be packed in specialty boxes.
  • Ease of Handling: Boxes should be easy to lift, carry, and stack without strain. Choose sizes that allow for comfortable movement through doorways and hallways.
  • Storage Duration: If your belongings are to be stored for a while before unpacking, consider using boxes or bins that can resist moisture and stacking pressure over time. This helps protect your items during long-term storage or moves across the country.

Tips for Packing Efficiently with Different Box Sizes

Tips for Packing Efficiently with Different Box Sizes

The easiest thing you can do to enjoy a smooth move is to match the box size to the item’s weight and type. This simple step keeps your boxes manageable and prevents damage from overloading. Next, make sure to distribute weight evenly when loading boxes into your moving truck. Doing this helps maintain balance during transport and protects fragile items from being crushed.

It also helps to fill any empty spaces inside boxes with soft items like towels, linens, or clothing. Doing so prevents items from shifting during the move and makes full use of the space you have. You’ll need fewer boxes overall, which can help cut down on moving costs.

For added protection, avoid overpacking boxes. While it may seem efficient to squeeze in as much as possible, doing so can make boxes too heavy or cause items to break. Instead, leave some room for bubble wrap or packing paper to cushion delicate belongings.

Finally, if you’re moving during a rainy season or to a humid area, use waterproof containers like plastic bins for moisture-sensitive items. Unlike cardboard boxes, plastic bins keep your belongings dry and safe from mold or water damage, giving you extra peace of mind during your move.

Need Help Deciding the Best Box Sizes for Moving?

Choosing the best box sizes for moving can make all the difference in how smoothly your relocation goes. With the right system, like using small boxes for heavy items and large boxes for light, bulky ones, you’ll keep your belongings safe and make loading and unloading easier for everyone.

However, choosing the right-sized box is only half the battle. You’ll still need to figure out how many boxes you’ll need and what to do with them after the move. That’s where Stack Moves comes in. Our rental moving bins are designed to make your move simpler, cleaner, and more organized from start to finish, giving you an eco-friendly solution you can trust.

Ready to enjoy a stress-free move? Contact us to book your moving boxes for rent now!

Frequently Asked Questions

Still unsure what box sizes to use for your move? This FAQ section answers common questions to help you pack confidently and choose the right boxes for your belongings.

How Do I Choose the Right Box Size for Heavy Items?

Always pack heavy items like books, tools, or canned goods in small boxes. This keeps the box’s weight manageable (under 40-50 pounds) and prevents the bottom from giving out.

What Size Boxes Are Easiest To Move?

Small and medium boxes are the easiest to handle. When packed correctly, they remain light enough for safe lifting and are uniform for efficient stacking in the moving truck.

Can I Reuse Grocery Boxes for Moving?

Yes, you can reuse sturdy boxes from grocery or liquor stores, but check them for damage or moisture. Their compact size makes them ideal for small, heavy items. However, they won’t stack as neatly as uniform moving boxes.

Do Moving Companies Provide Boxes Or Should I Buy My Own?

It depends on your budget and priorities. Most moving companies sell professional-grade boxes that are often double-walled and very sturdy. But these are more expensive than the boxes sold at retail stores. A major advantage of using these boxes is their perfect fit, which maximizes the space in their moving trucks.

What Should I Pack in the Largest Moving Boxes?

The largest boxes should be used for light, bulky items. This includes linens, bedding, pillows, comforters, and curtains. Packing heavy items in them will make them dangerous to lift and prone to breaking.

What Are Specialty Moving Boxes?

Specialty boxes are custom-designed for awkward or fragile items. Examples include wardrobe boxes (with a metal bar for hanging clothes), dish packs (with reinforced walls and dividers), and TV boxes (with extra padding).

What Are The Best Moving Boxes To Buy?

The type of moving box you buy can impact your moving experience because the right box will protect your fragile items, maximize space in your moving truck, and reduce moving-day stress. Plastic bins are widely considered the best moving boxes to buy since they’re sturdier, stackable, and reusable compared to other moving boxes. However, the final choice depends on your budget, storage needs, and whether you prefer a one-time or long-term solution.

Stack Moves is a U.S.-based moving service that has helped hundreds of movers simplify their relocations. With two years of trusted service, our friendly team has helped families and businesses relocate more easily using our high-grade moving bins for rent. Contact us now to reserve your moving bins and guarantee delivery before moving day!

In this blog, we’ll cover the different types of moving boxes, where to buy them, and expert tips for packing effectively. By the end, you’ll know exactly which moving boxes fit your needs and how to use them for a seamless move.

What Are the Best Boxes for Moving?

What Are the Best Boxes for Moving?

What’s considered the best moving box really depends on what you’re packing and your moving budget. We’ve listed different types of moving boxes along with their pros and cons so you can choose the option that fits your move best.

1. Plastic Moving Boxes & Totes

First on this list are plastic moving bins. These durable bins are considered the best bins for moving because of their advanced durability. Unlike traditional cardboard boxes, they are water-resistant, making them especially reliable for fragile or valuable items.

Another major advantage to using these boxes is they are reusable. If purchased, they can serve as long-term storage solutions long after the move. They are also easy to stack, which helps maximize space and keep belongings protected during transit.

Plastic boxes also come in the form of plastic totes, which are more commonly used for corporate relocations. The only drawback of both plastic bins and totes is their higher upfront costs compared to cardboard. That’s why many people choose to rent plastic bins instead, since renting offers all the same benefits at a fraction of the price.

It may be wise to invest in or rent plastic moving bins or totes for your move if your priority is durability, protection, and space efficiency.

2. Cardboard Boxes (Heavy-Duty & Standard)

Next on the list are cardboard boxes. These are the most common moving boxes because they’re widely available, affordable, and come in a variety of sizes to suit different packing needs. Cardboard boxes are also recyclable, which makes them a reasonably eco-friendly option if disposed of properly.

Standard cardboard boxes are lightweight and easy to assemble, making them practical for everyday items like clothing, linens, or kitchenware. Additionally, they’re inexpensive and can be sourced secondhand for free from friends, relatives, and online stores like Facebook Marketplace.

Cardboard boxes also come in heavy-duty versions, which are reinforced and more suitable for heavier or fragile items like books, dishes, or electronics. Heavy-duty boxes provide extra protection compared to standard cardboard but still fall short of the strength and moisture resistance offered by plastic bins.

The main drawbacks of cardboard are that they can weaken when exposed to moisture, are less durable for long-term storage, and often need to be discarded after a single move. If your priority is affordability and convenience, cardboard boxes are a practical choice for most household moves.

3. Specialty Boxes

Finally, there are specialty boxes. Although specialty boxes are not essential for every move, they can be invaluable if you need extra protection for high-value, fragile, or oversized items. These include wardrobe boxes, dish boxes, and any other type of box specifically designed to keep unique belongings safe.

Their biggest advantage is superior protection. Whether it’s keeping clothes wrinkle-free, shielding fragile glassware, or securing electronics, specialty boxes provide tailored solutions that standard boxes can’t match.

The downside to using them is the high purchase cost. Specialty boxes are often more expensive than regular cardboard and may only be used once and can also take up extra space in the moving truck. However, for items that are fragile, oversized, or valuable, the added expense is often worth the peace of mind.

Here’s a quick list of common specialty boxes and their best uses:

  • Wardrobe boxes: hanging clothes, coats, and dresses.
  • Dish boxes: plates, glasses, and other kitchenware.
  • Picture boxes: artwork, mirrors, and framed photos.
  • TV boxes: flat-screen televisions.
  • Lamp boxes: Tall or fragile lamps.
  • Mattress boxes: Mattresses of all sizes.
Type Pros Cons Cost Best For
Plastic Bins & Totes Durable, water-resistant, reusable, easy to stack, eco-friendly, saves space Expensive to purchase outright $10-$30 Fragile items, long-distance moves, eco-conscious movers, corporate relocations
Cardboard Boxes Affordable, widely available, recyclable, various sizes, heavy-duty options Weak against moisture, less durable, often single-use $1-$8 General household items, budget-friendly moves
Specialty Boxes Designed for specific items, extra protection, makes unpacking easier More expensive, bulky, not always reusable or needed $5-$40 Clothes, dishes, artwork, TVs, lamps, mattresses

Where to Find Moving Boxes

Where to Find Moving Boxes

One of the easiest places to start is by asking people you know. Many households have leftover boxes from past moves or deliveries that they’re happy to give away. This is often the most convenient way to get moving boxes for free.

You can also get moving boxes from retail stores. Grocery stores, bookstores, and liquor stores receive regular shipments in sturdy boxes, and most are glad to let customers take them once they’ve been unpacked. For even greater convenience, online retailers make it easy to buy in bulk and often at lower prices. This makes them the best place to buy moving boxes for cheap.

Community groups on platforms like Facebook Marketplace and Craigslist can also be a goldmine for free boxes. But if you’d prefer new boxes for consistency and durability, you can source boxes from local moving supply stores and home improvement retailers like Home Depot or Lowe’s.

Is It Better to Rent or Buy Moving Boxes?

It’s almost always better to rent moving boxes, especially if you’re planning a standard household move. Renting is cheaper in most cases and more convenient since boxes are delivered and picked up from your location. They’re also far more eco-friendly because you avoid creating unnecessary waste during the move.

That said, buying boxes can sometimes be the better option. Especially if you plan to keep these boxes for long-term storage after your move. In situations like this, owning your boxes makes more sense.

In the end, it all depends on what’s important to you. If you want to save money, reduce stress, and keep your move as efficient as possible, renting is the way to go.

What to Look for When Choosing Moving Boxes

What to Look for When Choosing Moving Boxes

Before you decide which moving boxes to buy, there are a few key factors that can make all the difference. We’ve covered 5 major ones to help you choose the right boxes with confidence.

  1. Durability and Strength: Your boxes should be able to handle the weight of heavy household items like books, dishes, and clothes without collapsing. Heavy-duty cardboard options are best suited for protecting fragile items, while plastic bins offer superior protection against damage.
  2. Size Variety: Moving boxes typically come in small, medium, large, and extra-large. Small boxes work best for compact, heavy items (e.g., books, canned goods), medium boxes are versatile for everyday items, and large or extra-large boxes are ideal for bulky belongings like bedding and appliances.
  3. Eco-friendliness: Cardboard boxes can be recycled, but plastic bins are reusable and reduce waste over time. This makes them a more sustainable option, especially if you choose to rent instead of buy.
  4. Ease of Carrying & Stacking: Handles, lids, or sturdy designs can make boxes easier to move. Plastic bins are ergonomically designed to reduce awkward lifting that can lead to musculoskeletal problems during a move. And their stackable design makes it easier for them to maximize space in the moving truck.
  5. Ease of Cleaning: Plastic bins are water-resistant and easy to wipe clean, unlike cardboard, which can get dirty, tear, or lose strength if exposed to moisture. This makes them more reliable for multiple uses or long moves.

How Many Moving Boxes Do I Need?

One of the trickiest parts of planning is figuring out just how many moving boxes you’ll actually need to move. Too few boxes will have you scrambling on moving day, and too many means you’ll end up wasting money and space.

If you want a quick, stress-free answer, the easiest way is to use a moving box calculator. The truth is, the number of boxes you need depends on factors like the size of your home, the quantity of items you own, and the types of items you’re packing. A moving box calculator takes out the guesswork and gives you an accurate estimate of how many boxes you need to prepare for your move.

7 Smart Ways to Save Money on Moving Boxes

7 Smart Ways to Save Money on Moving Boxes

Moving costs can add up quickly, but that doesn’t mean you have to break the bank just to secure good-quality moving boxes. Here are 7 smart ways to save money on moving boxes without sacrificing quality or convenience.

  1. Start with Free Options: Ask friends, family, or neighbors if they have leftover boxes from recent moves or deliveries. Grocery stores, liquor stores, and bookstores are also great places to score sturdy boxes for free.
  2. Check Online Marketplaces: Sites like Facebook Marketplace, Craigslist, or Freecycle often have people giving away or selling moving boxes at a fraction of the retail cost.
  3. Buy in Bulk: Retailers like U-Haul, Home Depot, or Amazon usually offer discounts when you buy boxes in bundles rather than individually.
  4. Mix and Match Box Types: Instead of buying only brand-new heavy-duty boxes, combine them with free or cheaper standard boxes for less fragile items. This helps you save while still protecting valuables.
  5. Reuse What You Already Have: Suitcases, laundry baskets, storage bins, and even dresser drawers can double as moving containers, cutting down on the number of boxes you actually need to buy.
  6. Opt for Reusable Plastic Bins: While more expensive upfront, plastic bins can be reused for storage long after the move, making them a cost-effective investment over time. If you don’t want to buy, consider renting them instead.
  7. Look for Seasonal Promotions: Moving supplies often go on sale during peak moving seasons (spring and summer). Check local hardware or big-box stores for discounts and promotions before you buy.

One of the best ways to save money on moving boxes is by renting reusable plastic moving bins. These are sturdier than cardboard boxes and often more cost-effective. Companies like Stack Moves offer durable bins that can be delivered to your door, saving you the hassle of buying new boxes. Renting also reduces waste and is an eco-friendly option.

Before you rush out to purchase boxes, check around your home for items you can repurpose. Baskets, suitcases, laundry hampers, and even large bags can be used to transport your belongings. This minimizes the number of large moving boxes you will need to buy and helps you use every available space.

Using the right size boxes for your belongings can also prevent over-packing and unnecessary costs. Typically, small boxes are perfect for heavier items like books, while medium boxes work well for most household goods. Larger items like bedding or clothing can go in large or extra-large boxes.

It is also important to plan ahead as buying moving supplies last minute can lead to overspending. Planning ahead gives you time to look for the best moving box deals online and allows you to take advantage of sales and bulk discounts. 

Need Durable Moving Boxes for Your Next Move?

Choosing the right moving boxes can make a huge difference in protecting your belongings and keeping your move organized. While buying has its place, renting moving boxes is often the smarter, more cost-effective choice. When you rent moving boxes, you get durability, convenience, and eco-friendliness without worrying about storage or disposal.

If you’d like to rent moving bins for your next move, Stack Moves makes it simple with durable moving bins delivered straight to your door. We’d also be happy to share expert advice on how you can plan for the seamless relocation you deserve. Schedule a free consultation with us today!

FAQs

It’s normal to have some questions around the quality, cost, and convenience of buying moving boxes before making a decision. We’ve answered some of the most common ones below to help you choose the right option for your move.

What Type of Box Is the Best for Moving?

The best box depends on what you’re packing. Standard cardboard boxes are fine for most items, and the heavy-duty boxes provided added strength for fragile belongings. But if you want maximum durability, plastic bins are the best moving boxes to buy.

Are Lowe’s or Home Depot Moving Boxes Better?

Both Lowe’s and Home Depot sell high-quality moving boxes in a range of sizes. In terms of cost, Lowe’s boxes are often slightly cheaper, while Home Depot offers more specialty options.

What Is the Cheapest Way to Get Moving Boxes?

The cheapest way is to source free or used boxes from grocery stores, bookstores, or online platforms like Facebook Marketplace. If you need stronger ones, buy in bulk from a moving company or retailer to cut down per-box costs.

Is It Better to Move with Bags or Boxes?

Boxes are almost always better because they protect items, stack neatly, and make loading safer. Bags are okay for clothing, linens, or other soft, lightweight items but aren’t a replacement for proper moving boxes.

How Many Boxes Should You Buy for Moving?

It depends on your home size and packing style. A collector living in a studio apartment could end up using more boxes than a minimalist in a two-bedroom. Generally, a good rule of thumb is to focus on the size of your home, and with the help of a moving box calculator, you can get a more accurate estimate of how many boxes you’ll actually need.

Do Movers Prefer Boxes or Bags?

Movers strongly prefer boxes because they stack efficiently and keep items safe in transit. Bags can tear, shift around, and don’t protect fragile items. To keep your movers (and your belongings) happy, use boxes whenever possible.

How to Pack Bathroom Items for Moving?

Packing bathroom items can be one of the trickiest parts of moving, since toiletries are prone to leaks, spills, and breakage. That’s why knowing how to pack bathroom items for moving the right way is essential; otherwise, you risk costly damage and extra stress. The safest approach is to secure liquids in spill-proof bags, cushion fragile items, and use sturdy, water-resistant containers that won’t give way to moisture.

Over the years, Stack Moves has helped movers relocate with confidence thanks to our professional-grade plastic bins. These sturdy boxes come with secure lids, making them the perfect solution to protect fragile bathroom items like toiletries. Don’t risk leaks or breakage—contact us today to book your moving bins for rent.

In this post, you’ll discover the best ways to pack toiletries and bathroom items for a move. You’ll also learn how to create a first-day essentials kit and how to choose the right bins to keep everything secure.

How to Pack Bathroom Essentials for a Move

How to Pack Bathroom Essentials for a Move

Packing bathroom essentials for a move can be tricky, especially with fragile items and liquids prone to spills. Follow this step-by-step guide to ensure the safety and organization of your bathroom items.

1. Declutter and Sort

Before you start packing, it’s important to declutter your bathroom to avoid moving unnecessary items and reduce the risk of accidents. Go through all your toiletries, cleaning supplies, and bathroom accessories, and decide what to keep, donate, or throw away.

Pay special attention to nearly empty containers, expired cosmetics, and hazardous products like nail polish or bleach, which should be disposed of safely. Once decluttered, categorize your items for easier packing and organization. Group similar items together, e.g., toiletries like shampoo, conditioner, and soap should be placed in the same container. Another example is grouping medications and first aid supplies.

By decluttering and sorting, you’ll know exactly what needs to go in your moving boxes, speed up packing, and reduce the risk of accidents during the move.

2. Gather Packing Supplies

To pack bathroom items for moving safely, you need the right supplies that protect your belongings and prevent spills. Make sure you have moving boxes (preferably water-resistant), bubble wrap or protective padding, sealable plastic bags for liquids, packing tape, labels, and small containers. Also, remember to get cleaning supplies to sanitize each item before packing.

For liquids like shampoos, conditioners, nail polish, and other liquid-based toiletries, use waterproof containers and leak-proof bags. You’ll be able to prevent leaks that could damage other items in your boxes this way. Plastic wrap is also helpful to seal bottle openings and padding like towels or bubble wrap cushions fragile containers during the move.

3. Pack Liquids and Toiletries

Liquids and toiletries are prone to leaks and spills, so it’s important to pack them carefully. Proper padding, careful placement, and leak-proof containment ensure your toiletries and fragile items stay safe throughout the move.

Put plastic wrap under the lids of opened bottles and store them in airtight plastic bags to prevent leaks. Use small, sturdy boxes for liquids to keep bottles upright and secure. Place makeup containers in specialized makeup bags, and cushion glass bottles like perfumes with towels or packing paper to prevent breakage.

Hazardous items such as nail polish remover or hair dye should also be packed in sealed plastic bags for extra protection. Keep medications and other bathroom essentials that you’ll need immediately separate in a well-labeled box. This tip also applies to first-day essentials, so you can access them without digging through multiple boxes.

4. Protect Fragile Items

4. Protect Fragile Items

Fragile bathroom items like mirrors, glass bottles, and decorative pieces require extra care to prevent breakage. Wrap each item individually in bubble wrap or packing paper, and make sure all sides are covered. You can also use towels and washcloths for extra padding between items to prevent movement during transit.

When placing items in boxes, put heavier items on the bottom and fragile ones on top to avoid crushing. Fill any gaps with packing paper, towels, or bubble wrap to keep items from shifting while the box is being moved. Using medium-sized boxes helps keep the weight manageable and reduces the risk of dropping or damaging the contents.

For additional protection, consider double-boxing, especially delicate items like large mirrors or glass jars: place the wrapped item in a slightly larger box filled with padding, then place that box inside another box for extra cushioning. Following these steps ensures your fragile bathroom items stay intact and reduces stress on moving day.

5. Organize Small Accessories & Electronics

Small bathroom accessories and electronics are easy to lose or damage if not packed carefully. Keep items like hair ties, razors, tweezers, and cotton pads organized in small but sturdy boxes or reusable containers to prevent them from scattering during the move.

Electronic items should be packed in their original packaging if possible or wrapped in towels for added protection. Soft items like shower curtains, towels, and bath mats can cushion fragile items or delicate appliances inside your boxes. This will keep your items organized while maximizing the space you have.

Store cords and chargers in sealable plastic bags to prevent tangling. Pack batteries in their original packaging or a designated container to avoid leaks or short circuits

6. Pack Medications and First Aid

Start by checking expiration dates on all medications and safely dispose of unused medicine or anything that’s no longer needed. Next, pack all medications (prescription bottles, over-the-counter medicines, and any liquid medications) in a clearly labeled, airtight plastic bag or small container to keep them organized and protected from moisture. Check that lids are tightly sealed to prevent any spills.

First aid supplies like bandages, antiseptics, and medical tools should be stored in a separate, labeled container so they’re easy to find during and immediately after your move. For added convenience, consider keeping a small “emergency kit” within reach, containing the items you may need on the first day in your new home.

7. Prepare a First-Day Bathroom Essentials Box

A first-day bathroom essentials box is a well-marked and readily available container containing everything you’ll need when you arrive in your new home. A box like this will keep you from digging through multiple moving boxes to find basic necessities, thereby reducing stress on your first day.

Pack the box with all items you’ll need for immediate use so you can freshen up and settle in comfortably. This includes a toothbrush and toothpaste, deodorant, essential skincare products, medications, a few towels, toilet paper, soap, and hairbrushes.

For smaller items, store them in clear, transparent bags so they’re easy to see and grab without unpacking everything. Proper preparation ensures a smoother move-in and a stress-free first day in your new home.

How to Choose the Best Moving Boxes for Bathroom Items

How to Choose the Best Moving Boxes for Bathroom Items

The best bin for moving largely depends on the items being packed. Toiletries and bathroom items are usually liquid-based and fragile, and can cause a mess if a leak happens. Think shampoos, soaps, perfume bottles, cosmetics, and mirrors.

Because of these qualities, cardboard boxes won’t offer much protection for delicate items since they’re easily damaged by moisture. This is where plastic bins take the lead in the debate of moving boxes vs plastic bins. Plastic moving bins are durable, water-resistant, and spill-proof thanks to their lids. When combined with proper padding like towels, bubble wrap, or washcloths, they create the safest environment for transporting bathroom essentials without leaks or breakage.

Final Checks Before Sealing Boxes

Once you’ve selected the right boxes and packed your items, the next step is to perform final checks before sealing them. Before sealing your boxes, make sure to:

  • Secure fragile items: review each box to ensure it is properly packed and secure for the move. You must ensure that fragile items like glass containers are cushioned with bubble wrap or towels.
  • Double-check your bathroom: go through your bathroom cabinets once more to verify that you haven’t left behind important items like hair dryers, shower caps, and other bathroom appliances.
  • Label boxes clearly: ensure that all the boxes are clearly labeled with their contents and the room they belong to. For example, mark boxes containing fragile bathroom items or first aid supplies for easier unpacking later.

Want a Spill-Proof Way to Move Your Bathroom Items?

Packing up toiletries and bathroom essentials is often the messiest part of moving. A smart approach ensures your bathroom goods travel safely and you settle in stress-free. The most efficient way to pack bathroom items is to contain liquids tightly and protect breakable items from impact.

This means to always pack delicate items with extra padding or place liquids in spill-proof containers like plastic moving bins. Each rental also comes with labels to make tracking your bathroom essentials and other belongings much easier.

Don’t let leaks or broken bottles slow you down on moving day. Our moving bin rental service in Los Angeles delivers sturdy bins right to your location and ready for use. Schedule your moving bins today!

Frequently Asked Questions

We answered your most asked questions about packing bathroom items for a move to help you enjoy a stress-free move.

How Do I Pack Toiletries for Moving?

Properly packing toiletries helps prevent leaks and damage. Use spill-proof bags for liquids, cushion fragile containers with towels or bubble wrap, and keep all similar items together in small, sturdy boxes.

What Is the Best Way to Pack Bathroom Items for Moving?

The best approach combines leak-proof containers for liquids, extra padding for fragile items, and clear labeling. Using stackable plastic moving bins adds durability and keeps your items organized during transit.

How Should I Pack Liquids for Moving?

Place plastic wrap under bottle caps and store liquids in airtight, sealable bags. Keep them upright in small, sturdy boxes, and separate hazardous liquids like nail polish remover or bleach from other items.

How Do I Pack Cleaning Supplies When Moving?

Check labels for flammability and expiration dates, and securely close all containers. Transport cleaning products in a dedicated box or plastic bin, preferably lined with absorbent material to contain spills.

How Can I Pack Medications and First Aid Supplies Safely for a Move?

Sort medications by type and expiration date, and store them in clearly labeled airtight bags or small containers. Keep first aid supplies separate for quick access on moving day.

What Should I Include in a First-Day Bathroom Essentials Box?

Include items you’ll need immediately, like a toothbrush, toothpaste, deodorant, essential skincare products, a few towels, toilet paper, soap, and any medications. Store smaller items in clear bags for easy access.

Will Movers Move Plastic Bins?

Packing is one of the greatest challenges of moving, and choosing the right containers can make all the difference. While cardboard boxes are the traditional choice, more people are turning to plastic bins because they’re reusable, stackable, and secure with tight-fitting lids.

So, will movers move plastic bins for you? The answer is yes, they will. However, some may have restrictions on size, weight, or how the bins are packed, so it’s always best to confirm ahead of time.

In the past two years, Stack Moves has simplified the relocation process for numerous families and businesses using our professional-grade plastic bins. Our moving bins for rent are designed to save space, protect belongings, and reduce waste. Our friendly support team is always ready to answer all your questions and help you plan for a hassle-free move. Contact us today!

In this post, we’ll explain why movers sometimes set rules around plastic bins. We’ll also share tips on how to pack them properly and why choosing the right bins can save you time, money, and hassle.

Do Professional Movers Accept Plastic Storage Bins?

Will Movers Move Plastic Bins?

The answer is that it depends on the company. Most movers have no problem handling sturdy plastic bins, but some may place restrictions on their size, weight, or how they’re packed. Since every moving company has its set of policies, it’s important to confirm these details in advance.

Some movers even prefer plastic bins because they’re durable and stack neatly, while others may limit their use. Checking ahead of time helps you avoid unpleasant surprises on moving day and ensures your belongings are packed in a way your movers can safely transport.

When Movers May Refuse to Move Plastic Bins

Moving companies may refuse to move your plastic bins if they exceed safe weight limits. Overfilling plastic totes or storage bins can render them too heavy for safe movement. This increases the risk of damage to the bins and injury to the movers.

Another reason why movers may refuse to move your plastic storage bins is the lack of proper labeling. It is important for movers to know what’s inside the bins for safe handling, especially if the contents are fragile or require extra care. Similarly, unlabeled plastic items can pose risks. For these reasons, movers may not want to move plastic bins so they don’t incur damages. 

Additionally, movers may decline to move your plastic bins with unsealed or broken lids because items packed in such boxes are more likely to fall out. The company wouldn’t want to be responsible for any losses you may incur.

Items That Shouldn’t Go in Plastic Bins

There are certain things you shouldn’t pack in plastic bins because these boxes can trap moisture and cause damage or create safety risks during your move. Here’s a quick guide:

Item Risk
Leather Mold or mildew buildup
Photos Sticking, fading, or curling
Electronics Overheating or static damage
Batteries Leakage, corrosion, or even fire hazards
Shoes Odor buildup and mold
Delicate Fabrics & Natural Fibers Yellowing, wrinkles, or mildew
Cleaning Supplies Spills or chemical reactions
Antiques Cracking or warping
Chemicals Toxic leaks or dangerous reactions

The best way to work around these risks is to make sure both your items and the bins are completely dry before packing. Use protective wraps like bubble wrap, cloth covers, or silica gel packs to prevent moisture buildup, and reserve breathable containers for sensitive items. This way, you can still enjoy the strength of plastic bins without putting delicate belongings at risk.

Why Are Plastic Tubs for Moving a Popular Choice?

Plastic containers are the best bins for moving. Unlike cardboard boxes, they can handle heavier loads and offer stronger protection for your belongings. Other key benefits include:

  • Better Protection: A primary advantage of plastic totes is their superior protection compared to cardboard containers. Plastic bins are an ideal choice for fragile or delicate items because they typically maintain their shape integrity and protect content from damage.
  • Weather Resistance: Another advantage of plastic moving boxes is weatherproofing. Unlike cardboard, plastic bins provide a weatherproof solution that ensures your items remain dry and intact during the move.
  • Reusability & Sustainability: Their reusable nature makes them a more sustainable and eco-friendly choice. You can reuse plastic containers for future moves or storage, eliminating the need to purchase new boxes each time. However, it is best to rent plastic moving boxes, as it reduces waste and promotes a greener move.

A 6-Step Guide to Packing Plastic Bins for Moving

How to Pack Plastic Bins for Moving

Even though plastic bins are the best containers for moving, they can still lead to damage or inefficiency if they’re not packed correctly. Follow this simple 6-step guide to pack your plastic bins the right way:

1. Gather Your Packing Supplies

First, make sure you have all the essentials on hand. This includes plastic bins with secure lids, strong packing tape, permanent markers, and protective materials like bubble wrap. It’s important to treat your supplies as an investment in keeping your belongings safe. Using poor-quality packing materials will put your possessions at risk.

2. Sort and Arrange Your Items

Try not to toss items into bins randomly. Sorting first allows you to group similar items together, making packing more efficient and unpacking less stressful. Doing this also keeps bins balanced and makes them easier for movers to handle.

3. Prepare and Label Your Bins

If you’ve previously used your bins for storage, quickly clean them to get rid of any dust or residue. This extra step keeps your belongings fresh during the move. Next, clearly label each bin on multiple sides with both its contents and the destination room. Labels help movers know where each bin goes and alert them if a container needs special care (e.g., “Fragile – Glassware”).

4. Pack Your Items Correctly

Place heavier items at the bottom and lighter ones on top to maintain stability. It will also prevent the binsfrom getting crushed and damaging any items during the move. Use bubble wrap or packing paper to fill any gaps and stop items from shifting during transit. It is also important to avoid overpacking the bins. While plastic storage bins are sturdy, overfilling them can make them difficult to stack and transport.

5. Secure the Lids

There’s no harm in adding an extra layer of security to your moving bins. Use packing tape or zip ties to keep lids from popping open during transport. This simple step ensures that nothing spills out if bins are stacked or shifted in the moving truck. Think of it as a safety belt for your belongings.

6. Stack the Bins in Your Moving Truck

Stack the bins strategically to maximize space and stability. A well-stacked load protects your items and makes unpacking at your new home much easier. For enhanced stability, place lighter boxes on top of the heavier ones. Additionally, make sure the boxes are aligned edge to edge. This prevents tipping and reduces movement while on the road.

Tips for Preparing Plastic Bins for Movers

Tips for Preparing Plastic Bins for Movers

One of the most important rules when packing plastic bins is to keep the weight manageable. Even though plastic bins are sturdy, they can still be difficult to lift or stack when overfilled. 

It is also important to clearly label your plastic moving boxes to easily identify the contents. For example, mark bins with “fragile items” or indicate which bins are heavier. This will help so your professional movers know how to handle each bin. 

Additionally, make sure the plastic containers are sealed properly to prevent a bin’s contents from spilling out. While the lids on plastic storage bins are generally secure, you can add an extra layer of protection to them. Use either tape or zip ties to ensure that the lids do not pop open during transport.

Is It Better to Rent or Buy Plastic Boxes?

It’s almost always better to rent plastic moving boxes instead of buying them and here’s why:

Firstly, renting is affordable. You only pay for the bins you need during your move, instead of spending hundreds on containers you may never use again. Additionally, renting is also more convenient. Most rental companies will deliver bins to your door and pick them up afterward, saving you the hassle of transportation and storage. And lastly, renting boxes is more eco-friendly. Renting promotes sustainability by reusing durable containers, reducing the need for single-use packaging or cheap cardboard boxes.

If you move often or need long-term storage, buying plastic boxes may be the smarter choice. While the upfront cost is higher, buying high-quality plastic bins is a solid investment because they last for years. However, buying also means committing storage space for bulky bins when they’re not in use.

Our Recommendation:

If you’re moving once or occasionally it’s better to rent. It’s cost-effective, eco-friendly, and takes the stress out of managing supplies. Buy if you move frequently or need multipurpose storage. The investment pays off when bins get regular use.

Ready to Make Moving with Plastic Bins Easier?

Moving with plastic bins is the easiest way to protect your belongings, save time, and cut down on waste. Compared to traditional cardboard boxes, plastic bins stack neatly, keep fragile items secure, and reduce stress on moving days.

To answer your question again: yes, most movers will move plastic bins. But because every company has its own policies, it’s always best to confirm in advance. No matter your mover’s policy, our professional-grade bins give you the confidence that your items are packed, protected, and ready for transport.

Don’t wait until the last minute. Schedule your moving boxes now!

Frequently Asked Questions

Do you still have questions about moving with plastic bins? Here are answers to the most common ones to help you prepare with confidence.

Are Plastic Bins Good for Moving?

Yes, plastic bins are excellent for moving because they’re durable, stackable, and water-resistant. They protect fragile items better than cardboard boxes and reduce waste since the same bins are reused multiple times.

What Things Will Movers Not Move?

Movers generally won’t handle hazardous items like chemicals, flammable products, perishable food, or valuables like jewelry and cash. Company policies vary, so it’s best to ask your moving company ahead of time.

Do Movers Prefer Boxes or Totes?

Most movers prefer uniform cardboard boxes since they’re lightweight and simple to stack. However, plastic totes or bins are becoming more popular because they protect fragile items and can be stacked neatly. Always check with your mover to see their preference.

Will Movers Move Things That Aren’t in Boxes?

Yes, movers will often transport loose items like furniture or odd-shaped items. But for small or fragile objects, it’s best to pack them into boxes or bins for protection. Keeping things contained also helps your movers work faster and safer.

Can You Use Plastic Bins for Moving?

Absolutely! Plastic bins are sturdy, reusable, and ideal for protecting belongings. Many moving companies are comfortable moving them, though some still prefer cardboard moving boxes. Renting plastic bins is especially convenient since they’re delivered, picked up, and require no assembly.

How to Pack a Container for Moving?

Group similar items together to keep things organized and easier to unpack. Place heavier items at the bottom, then layer lighter or fragile items on top with padding for protection. Use clothes, towels, or packing paper to fill gaps and prevent shifting during transport. Finally, label each bin clearly so you know exactly what’s inside when you arrive.

List of Expenses When Moving Out

If you’re planning for a move but aren’t sure what expenses to include in your moving budget, you’re in the right place. During a move, you’ll face upfront costs like deposits, utilities, and dozens of smaller expenses you may not expect. This guide will outline the real costs of moving out so you can budget smart and stay in control.

At the very least, every list of moving expenses is categorized into professional services, moving supplies, transportation & travel costs, and home-related costs. Depending on the nature of your move, you may also incur other expenses such as insurance and temporary storage fees.

At Stack Moves, we’ve helped movers in the United States save hundreds of dollars on their move. With the help of our rental bin service, you can plan for a budget-friendly move without any added stress. Contact us today to secure your moving bins for rent.

This blog will cover the major expenses that form a part of any move, highlight hidden costs to watch out for, and share practical tips to keep your move affordable.

List of Expenses When Moving Out

List of Expenses When Moving Out

Your goal should be to account for everything that fits the unique needs of your move so there are no last-minute surprises. To assist, we’ve curated a list of the most common costs people face when moving out.

  1. Moving truck/van rental
  2. Travel costs
  3. Packing/moving supplies
  4. Cleaning supplies/services
  5. Professional packing services
  6. Storage units (short- or long-term)
  7. Utility setup fees
  8. Repairs/maintenance
  9. Furniture or appliances
  10. Decor and household essentials

1. Transportation Costs and Travel Costs

Transportation is one of the biggest parts of your moving budget, covering both how your belongings get to your new home and how you and your family travel during the move. The final cost depends on whether you hire moving companies or handle the process yourself

  1. Moving Truck/Van Rental: Renting a moving truck or van is often the largest transportation expense. Costs depend on the truck size, mileage, fuel, and rental duration. If you’re crossing state lines, expect higher charges, plus possible registration fees or liability insurance requirements.
  2. Travel Costs: On top of moving your belongings, you’ll also need to cover your own travel. This can include gas and tolls if you’re driving a personal vehicle, or flights and hotel stays for long-distance moves. Meals during travel add up quickly, especially for family members. If you’re relocating to a high-cost area like Los Angeles or New York, expect daily expenses to climb even higher.

2. Moving Supplies and Services

These expenses cover all the essentials you’ll need to actually carry out the moving process. From the packing materials to the cleaning supplies.

  1. Packing/Moving Supplies: Packing materials are a must-have in any move. The basics include moving boxes, bubble wrap, packing tape, and labels. You may also need extra tools like dollies or straps, which add to the cost but make handling heavy belongings much easier. Most people source for cardboard boxes because they are cheaper upfront, but these boxes can break down in humid weather or collapse under heavy weight. Plastic moving bins are a sturdier alternative if you want durability.
  2. Cleaning Supplies or Services: Both your old and new homes need to be cleaned, either to leave behind a good impression or to create a fresh, welcoming start. While DIY cleaning keeps costs low, hiring a professional service can save time and deliver a more thorough job, especially if you’re juggling family members, work, or other expenses. Depending on your budget, you should consider hiring a professional cleaning service to handle this task.
  3. Professional Packing Services: The cost often depends on the size of your home and the service level you need. While it’s more expensive than packing yourself, professional help ensures your belongings are protected, especially when combined with liability insurance. For many, the peace of mind makes this an investment worth considering.
  4. Storage Units (short- or long-term): If your move-out and move-in dates don’t align, renting a storage unit may be unavoidable. They’re also helpful if you’re downsizing or trying to arrange temporary housing. While short-term rentals are affordable, long-term storage can eat into your budget over time. Before paying registration fees and deposits, weigh whether it’s worth keeping everything or letting go of items you no longer need.

3. Setup & Settling In Costs

The expenses don’t stop even after the move is complete. Here we’ll look at the costs needed to make the space both functional and welcoming.

  1. Utility Setup Fees: When you move into a new home, utility companies will charge a connection or activation fee for electricity, gas, water, or internet. These may look small, but deposits or same-day/weekend services can quickly raise the total. It’s advisable to contact your provider early so you can plan for these expenses and ensure everything is running smoothly by move-in day.
  2. Repairs/Maintenance: Setting aside a little money for unexpected fixes prevents surprises after you’ve just spent on the move itself. Even in homes that look ready, small issues like leaky faucets, loose outlets, or squeaky doors often surface in the first few weeks. For renters, landlords may cover some repairs, but homeowners must pay out of pocket. These aren’t always optional costs since fixing them improves safety and comfort.
  3. Furniture or Appliances: Big-ticket purchases like furniture and appliances should be budgeted for early. It shouldn’t come as a surprise that your new home doesn’t come with a washer, dryer, or fridge. These purchases can easily become one of the biggest settling-in costs, so you should prioritize what you truly need right away and consider secondhand options to save money.
  4. Decor and Household Essentials: To truly make your house a home, you’ll want to personalize your space with decor and other practical items. Things like curtains, rugs, cleaning supplies, or cookware might not seem significant, but they add up when bought all at once. Planning a checklist for essentials and gradually adding decorative items helps you avoid overspending.

Hidden Moving Costs to Watch Out For

Hidden Moving Costs to Watch Out For

Knowing these hidden costs ahead of time better positions you to prepare for them in advance and save money for a less financially overwhelming transition. Some common unexpected expenses to be aware of include:

  • Tolls and Parking Fees: City moves or long-distance trips can rack up small but steady charges at bridges, highways, and street parking.
  • Pet Transportation: From flights to special carriers, traveling with pets quickly adds hundreds of dollars.
  • Childcare on Moving Day: Parents often forget babysitting or daycare costs, which can be essential when movers are coming in and out.

  • Moving Equipment Rentals: Dollies/trollies, moving blankets, etc., often aren’t included with truck rentals.
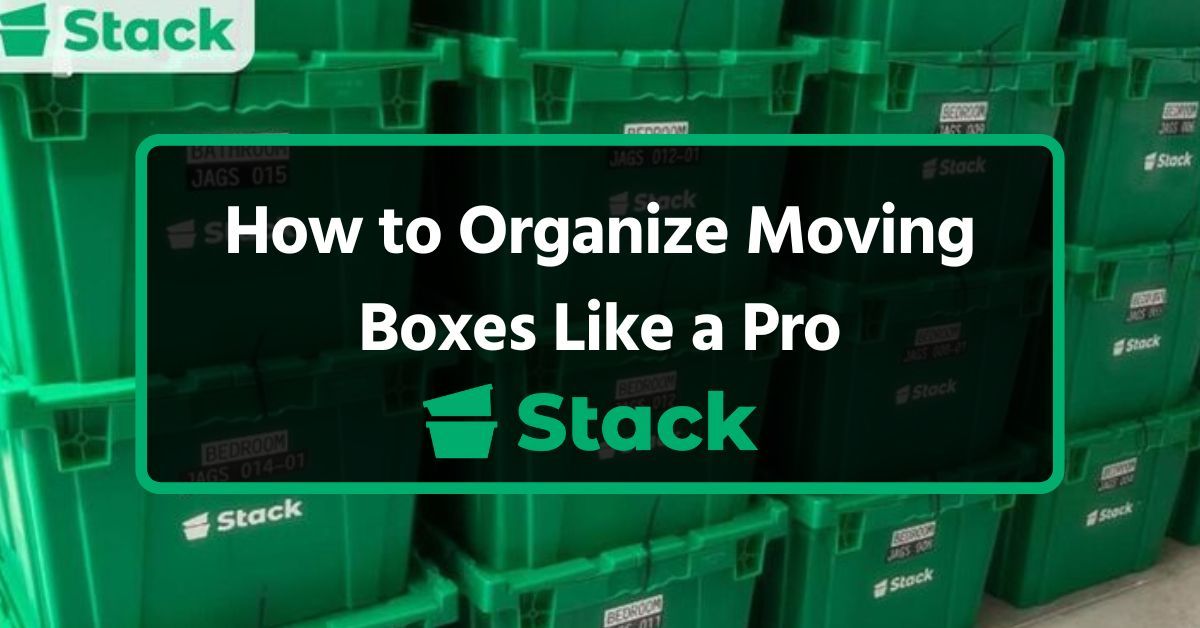
  • Moving Insurance Coverage: Standard coverage from movers is minimal; full-value protection costs extra.
  • Utility Disconnection Fees: While people expect setup charges, many providers also charge to disconnect old accounts.
  • Meals During Unpacking: Expect higher food costs in the first few days as takeout and delivery fill the gap before your kitchen is set up.
  • Lost Wages or Time Off Work: Time away from your job to manage the move can affect your paycheck.

Is It Better to Buy or Rent Moving Boxes?

Is It Better to Buy or Rent Moving Boxes?

Renting is often the better choice, especially for large or complex moves. But there are cases where buying may be the more sensible option. Before you choose between renting or buying your moving boxes, it’s important to first think about the long-term impact on both your budget and your moving experience.

For starters, renting is more affordable in the long run because you only pay for the time you use the bins. Plus, many rental companies include delivery and pickup in the price. Buying cardboard boxes might seem cheaper upfront, but if you need several sizes or larger quantities, the costs can add up quickly. Not to mention you’ll still have to handle transport and disposal yourself.

Renting is also far more convenient than buying boxes. Your bins are dropped off at your door before the move and collected once you’re done, leaving you with one less thing to worry about. When you buy your boxes, it’s your responsibility to transport them to your location and store or dispose of them after the move.

Another big difference comes down to quality and durability. Plastic rental bins are sturdier than their cardboard counterparts. Traditional cardboard boxes, especially when used, can be flimsy, wear out quickly, and may not hold up if you’re moving in bad weather.

Lastly, renting is the more eco-friendly choice. Plastic bins are reused many times, which significantly reduces waste and your overall carbon footprint. Even though cardboard can be recycled, a large number of boxes end up in landfills after just one use, making them a less sustainable option.

In summary, renting bins is usually the better choice if you want affordability, convenience, and a more eco-friendly move. Buying boxes, on the other hand, may work for very small moves or when you need storage afterward.

Smart Money-Saving Tips for Moving

Smart Money-Saving Tips for Moving

Declutter before you pack. One of the easiest ways to reduce moving costs is to lighten your load. You can do this by either selling or donating items you no longer need. The fewer items you take with you, the less you’ll spend on packing supplies and transportation.

Once you’ve reduced what you’re moving, the next step is to plan for what’s left by creating a realistic budget. A detailed budget helps you set financial limits for anticipated costs like supplies and transportation.

Even with a solid budget, it’s still important to track and control your spending. Moving often comes with small, unexpected costs, and it’s easy to go over budget. Monitoring your expenses and delaying non-essential purchases can keep your finances in check. In addition, building an emergency fund can help you tackle any unplanned but unavoidable expenses.

Another way to save money on a move is to rent moving boxes instead of buying them. Rental services are usually bundled with extras like labels and markers, which could help you reduce your spending on moving supplies.

Looking to Lower Your Moving Expenses?

With a list of your moving expenses, you can easily plan for your move without the fear of going over budget. However, an incomplete budget could put you at risk of unexpected costs. It’s important to remember that every move is different, and costs can vary depending on distance, services, and personal needs. That’s why the golden rule for creating a realistic budget that reflects your situation is to take all possible expenses into consideration.

If you’re planning your next move on a limited budget, one of the simplest ways to lower your moving expenses is to rent your moving boxes instead of buying them. That’s where Stack Moves comes in. With over 20 service locations across the U.S., our plastic bin rentals won’t just help you save costs; they’ll guarantee you a one-way ticket to a hassle-free move. Schedule your plastic bin rental today!

Frequently Asked Questions

To help you budget wisely and avoid last-minute stress, here are quick answers to the most common questions about expenses during the moving process.

What Do You Have to Pay For When You Move Out?

In addition to your first month’s rent, you’ll also have to pay a security deposit and utility setup fees. For the move itself, you’ll have to pay for packing supplies and professional moving services.

Is $3,000 Enough to Move Out for the First Time?

$3,000 is enough to cover a short-distance move from a small apartment in some areas. However, it may fall short if you need to buy new furniture, pay higher deposits, or cover temporary housing.

What Are Some Hidden Expenses When Moving?

Hidden costs often include cleaning services, storage units, and moving insurance. You may also run into extra fees from moving companies, such as charges for heavy or fragile items.

What Bills Do You Need to Set Up When You Move Out?

The main bills include utilities like electricity, water, and internet. You’ll also need renters insurance, and if you own a personal vehicle, don’t forget car insurance and registration fees.

How to Organize Moving Boxes Like a Pro

If you’re looking for efficient ways to organize your moving boxes, you’re in the right place. Getting this step right in the moving process can save you hours of frustration and even cut down your moving costs. The best way to organize moving boxes is to keep the same-sized boxes together, stack lighter boxes on top of heavier ones, and clearly label them so nothing gets misplaced along the way.

Enjoy a hassle-free move with Stack Moves‘ durable moving bins for rent. Trusted by hundreds of movers, our reliable and stackable bins fit neatly into your truck, helping you to save space and cut moving costs. Schedule your moving boxes today!

In this guide, you’ll learn every step of organizing moving boxes, from sorting items to labeling. We’ll also share proven moving tips that save time, protect fragile belongings, and make unpacking less stressful.

How to Organize Moving Boxes for a Stress-Free Move

How to Organize Moving Boxes for a Stress-Free Move

Without proper organization, it’s easy to forget essential items, leading to last-minute scrambling to find extra packing supplies. To help you stay organized and make your move as smooth as possible, here’s a practical guide on how to pack and arrange your moving boxes effectively.

1. Sort and Group Items Before Boxing

Before you begin packing, please take a moment to organize your belongings by category and room. Once grouped, you’ll find it easier to decide which box size works best and how to label them for moving. Another big advantage of decluttering is that you save money on supplies because you won’t need as many for items you no longer want. Start packing by grouping items such as books, clothes, kitchen tools, and picture frames into piles before putting them into boxes.

2. Choose the Right Box for Each Item

Using the wrong box can easily result in broken items or wasted space in your moving truck. For example, overpacking in a large box often leads to torn boxes or even back injuries from lifting. Specialty boxes are the best option when packing fragile items like dishes or hanging clothes. They provide the best protection for fragile items, despite being more costly than standard cardboard boxes.

To save money, consider using a combination of specialty boxes with standard cardboard boxes. Always reinforce the bottom and sides of cardboard boxes with strong packing tape to keep them from collapsing under heavy weight. With plastic moving bins, this step isn’t necessary because they are built to carry heavy loads without tearing.

3. Pack Boxes Without Overloading

One of the most important packing tips is to avoid overloading boxes. Overfilled boxes are harder to lift, more likely to break, and unsafe for movers to handle. A sensible rule is to keep boxes under 50 pounds, no matter the size. The major benefit of following this method is avoiding accidents, although it also means you will need more boxes overall.

Place heavier items at the bottom and lighter belongings on top to distribute weight evenly. This method protects fragile belongings like picture frames or glassware from crushing. Another mistake people make is trying to fit all the contents from a single room into the same box, which can make the boxes far too heavy.

Remember that overloading makes stacking boxes in the truck difficult, which can lead to more damage. Instead, mix heavier belongings with lighter fillers, like clothing or towels, to balance the weight.

4. Clearly Label Each Box

Without labels, unpacking becomes chaotic because you won’t know what’s inside each box or which room it belongs to. The most effective method of labeling boxes is to write the contents of the box and the room it belongs to. Use permanent markers to label at least two sides and the top of each box for easy visibility.

Another method of labeling boxes is by color-coding them, for example, blue for the bathroom, red for the kitchen, and so on. This method speeds up unloading since movers know exactly where each box should go. Although labeling your boxes will take extra time during packing, it will save you hours when unpacking. But overall, labeling ensures nothing important gets misplaced.

5. Number and Track Boxes with an Inventory List

In addition to labeling, you should also number each box and connect it back to your inventory list to add an extra layer of organization. Numbering each box lets you know exactly where everything is, and if you misplace a box, your list will help you quickly identify what’s missing.

Create a master list that matches box numbers to their contents and destination room. You can do this with a spreadsheet, a printed checklist, or even moving apps like Sortly. Update the master list each time you seal and label a box so you don’t forget.

6. Stack Boxes by Weight and Fragility

The general rule is to place heavier boxes at the bottom and lighter or fragile ones on top. This prevents breakage and helps keep stacks stable in the moving truck. Movers also prefer well-organized stacks since they can move them more safely.

Stack larger items or awkwardly shaped items against the truck’s walls. Also fill gaps with smaller boxes to maximize space. For fragile items like dishes, mark the box clearly and avoid stacking anything on top. Another helpful moving tip is to keep boxes of similar sizes together so they stack evenly. Using durable bins or sturdy used boxes can reduce the risk of collapse, especially for heavier loads.

7. Separate Essentials and Open First Boxes

Consider preparing a few “open first” boxes to easily access basic items without having to search through numerous boxes. Pack essentials such as toiletries, a change of clothes, medications, important documents, and basic kitchen supplies in clearly marked boxes. These boxes should be the last thing you load into the truck and the first thing you unload. You may also want to create a separate essentials box for each family member to keep things personal and organized.

Efficient Packing Techniques to Keep Boxes Organized

Efficient Packing Techniques to Keep Boxes Organized

Packing efficiently can significantly ease your moving process, making it smoother, faster, and less stressful. Follow these proven methods to keep boxes organized and simple to manage.

Distribute Weight Correctly

Ideally, you should avoid overpacking large boxes, as they can become too heavy to lift and are more likely to break. Stick to smaller boxes for heavier items and reserve large boxes for lighter, bulky items like pillows and comforters. It is best to distribute weight evenly across all boxes or combine heavy and light items in medium boxes to balance the weight.

Protect Fragile Items

When packing boxes, always place the heaviest items at the bottom. This provides a stable base and prevents lighter, more fragile items from being crushed. If you’re dealing with fragile items, you should wrap each one in bubble wrap or packing paper to prevent damage. You can take it further by placing a layer of padding (towels, blankets, or bubble wrap) between layers of items to prevent movement. Most importantly, mark boxes with fragile items clearly to ensure they are handled with care during the moving process.

Fill Empty Space

When packing, fill spaces to prevent shifting. You can do this by using clothing like socks or scarves to fill the gaps, or towels and blankets. You can also use bubble wrap and packing paper. What matters is that these spaces are filled with soft materials.

Use the Same Box for Similar Items

If it’s possible, pack similar items together in the same box (e.g., books with books, linens with linens). This makes labeling easier and saves time when unpacking. Mixed boxes are harder to sort and can slow down the moving process.

Seal Boxes Properly

A box is only as strong as its seal. Always reinforce seams with high-quality packing tape (not masking tape). For heavier boxes, tape in an “H” pattern across the top and bottom to prevent the box from opening under weight.

Don’t Use Damaged Boxes for Heavy Loads

While used boxes are fine for lighter items, they’re not ideal for heavy or fragile belongings. Reserve sturdy new boxes for larger items or valuables to avoid collapsed bottoms or torn corners.

Where to Find Moving Boxes

Where to Find Moving Boxes

Where you source moving boxes depends on whether you’d like to pay for them or get them for free. You can often find free cardboard boxes from friends, family, grocery stores, or online community groups. While sourcing free boxes saves money, these boxes are usually worn out, mismatched in size, or less durable, putting your belongings at greater risk.

Retailers like Amazon and U-Haul sell new moving boxes in different sizes, and some moving companies offer them for an additional fee. You’ll get sturdier boxes than the free options, but costs can add up quickly, especially for larger moves.

A cost-effective alternative is to rent moving boxes. Most rental companies provide boxes with additional packing supplies and often deliver them to your home and pick them up afterward. Renting combines convenience, strength, and eco-friendliness, making it the most reliable way to source boxes for your move.

What Are the Best Moving Boxes?

Plastic bins are the best moving boxes. They are durable, reusable, water-resistant, and often stackable. This often limits their cardboard counterparts to single-use due to their susceptibility to water damage and tumbling in transit. Although plastic bins are more reliable, they are pricier when compared to cardboard boxes, which is why we advise movers to rent them instead.

How Much Do Moving Boxes Cost?

Moving boxes cost between $1 and $8 per box, but this price varies depending on the size and quality. For box rentals, the price depends on how long the rental period is and the number of boxes needed. Renting can be more cost-effective when considering durability and convenience.

The boxes are usually delivered to your doorstep and picked up from your new location after the move. To avoid wasting money on more boxes than you need, use a moving box calculator to estimate how many boxes are needed for your move.

Essential Moving Day Tips for a Smooth Transition

Essential Moving Day Tips for a Smooth Transition

Keep these tips in mind as you make the big move:

  • Loading the Truck Strategically: Start by placing heavier items and boxes at the bottom and toward the front of the truck to maintain stability. Stack lighter and fragile items on top of heavier ones to prevent damage. Also, ensure the weight is evenly distributed to maintain balance during transport.
  • Keeping Essentials Accessible: Pack a clearly marked essentials box that contains important documents and first-day necessities such as toiletries, a change of clothes, basic kitchen supplies, toilet paper rolls, paper towels, and medications.
  • Communicate with Movers: Label each box with its destination room and any special handling notes. Take a few minutes to explain fragile or high-value items to your movers so they can be handled with extra care.
  • Do a Final Walkthrough: Walk through your old home to check closets, cabinets, and storage spaces to be sure nothing gets left behind.
  • Stay Comfortable and Safe: Wear comfortable clothes and sturdy shoes for lifting and walking. Keep water bottles and light snacks handy to maintain energy throughout the day.

Smart Tips for Unpacking and Settling In

Smart Tips for Unpacking and Settling In

These practical unpacking tips will help you turn your new space into a comfortable home quickly.

  • Start with essentials: Unpack rooms you’ll need right away, like the kitchen, bathroom, and bedrooms.
  • Unpack one room at a time: Focus on one room, finish it, then move to the next for a clear sense of progress.
  • Track your boxes: Cross off items from your moving checklist as you unpack. This helps you confirm that everything made it to your new home.
  • Break down or recycle materials: Flatten cardboard boxes and sort packing materials for recycling. You can also offer used boxes on community boards or keep a few for storage.
  • Repurpose what you can: Turn sturdy boxes into organizers for closets or garages.

Need an Easier Way to Organize Moving Boxes?

Staying organized during a move saves time, protects your belongings, and makes settling into your new space far less stressful. With the right strategy, you can make sure that every box fits in your truck and nothing gets left behind.

The best way to keep your moving boxes organized is to use proven tools and systems that encourage efficiency. This could mean properly labeling boxes or using high-quality packing materials like our stackable moving bins, designed to handle heavy loads and keep your items safe. Each rental comes with uniform boxes, labels, and dollies, making it easier for you to stack, track, and transport your load with ease.

Don’t let disorganized packing slow down your move; contact us now to book your moving bins today!

Frequently Asked Questions

We answered common questions about organizing moving boxes. These tips will guide you through the process and help you save time, money, and stress.

What Are the Best Ways to Pack Fragile Items in Moving Boxes?

Wrap each piece in bubble wrap or packing paper, and use dividers for glassware or dishes. Place heavier items at the bottom and lighter items on top. Fill any spaces with packing peanuts, crumpled paper, or towels to prevent shifting. Seal the box securely with tape and mark it “Fragile” on multiple sides so movers handle it with care.

How to Organize Boxes for Moving?

Stack lighter boxes on top of the heavier ones. Don’t overload your boxes because doing so could lead to damage or difficulty in handling them. Label each box clearly with its room and contents. This makes loading, unloading, and unpacking far more efficient.

How to Pack Books Efficiently in Moving Boxes?

Always use small, sturdy boxes to pack books, and keep them below 50lbs for easier lifting. To protect the spine of your hardcover books, lay them flat; paperbacks should be packed spine-down. Fill up spaces with soft cloths or paper to stop shifting. Clearly label the box as “Books” so movers know it’s heavy.

Should You Label Moving Boxes by Room or Item?

Labeling by room is most efficient, since movers can place boxes directly in the correct space. You can even combine both by labeling your boxes with notes like “Kitchen: Pots and Pans” to make the unpacking even easier.

What Items Should Not Be Packed in Moving Boxes?

Avoid packing perishables, plants, valuables, and hazardous materials in moving boxes. Other items, such as expensive jewelry and important documents, should travel with you. Some items, like chemicals, propane, or even paint, are unsafe for transporters to move. So it’s important to check your moving company’s restricted items list to stay safe and compliant.

Rent Boxes!