Medical Office Relocation Checklist Template
Download Medical Office Relocation Checklist
Relocating a medical office is a lot more complex than a standard business move. In addition to the usual logistics, healthcare facilities also have to account for patient safety, how they dispose of their waste, HIPAA-compliant data handling, among other things.
It all goes to show how the smallest oversight can lead to serious consequences. With a comprehensive moving checklist, you can allocate resources efficiently and avoid making any costly mistakes.
For this kind of high-stakes move, you can rent sturdy plastic moving crates from Stack Moves, which offer more protection than traditional cardboard. Backed by years of experience supporting corporate relocations across the US, our durable crates help keep sensitive equipment and files secure throughout the process. Rent your crates today and make your medical office move smoother from start to finish.
In this post, we will walk you through how to plan for your medical office move with a detailed medical office relocation checklist. We will cover everything from early planning and compliance to IT setup and post-move operations. Use this as a roadmap to ensure your relocation process is smooth, compliant, and stress-free.
Table Of Contents
- Why You Need a Medical Office Relocation Checklist
- Medical Office Relocation Plan for Beginners
- Pre-Planning Stage (6–12 Months Before Move Date)
- Compliance and Communication (3-6 Months Before Move Date)
- Equipment, IT, and Layout Coordination (1–3 Months Before the Move)
- Packing and Labeling (2-4 Weeks Before Move Date)
- Final Preparation (1 Week Before Move Date)
- Move Day
- Final Setup (First Week After Move Date)
- Want to Rent Reusable Bins and Cut Moving Costs?
- Frequently Asked Questions
Why You Need a Medical Office Relocation Checklist

Relocating a medical office involves complex legal, operational, and logistical requirements. A clear and detailed office moving checklist can help you stay organized, minimize disruptions, and ensure nothing critical gets missed along the way.
The first reason to create a medical office relocation checklist is that you’re dealing with more than just boxes. The requirements that apply to a medical office during a move are different from those of other businesses. They are regulated by multiple agencies and need to remain compliant every step of the move, or else they could face serious penalties such as losing their license.
The second reason to plan your move with a checklist is that there’s a risk of HIPAA violations or patient care gaps. Relocating improperly could put patient data at risk. If such an incident happens at any point during the move, it could lead to HIPAA violations and heavy fines. There’s also the risk of missed appointments or service interruptions, which can erode patient trust and harm your reputation.
Additionally, without a checklist, it would not be easy to get everyone on the same page. One of the great things about working with a checklist is that it clearly communicates everyone’s roles. Plus, vendors can be scheduled properly, and patients can receive timely updates about your new address.
Medical Office Relocation Plan for Beginners
This beginner-friendly plan breaks down the process step by step so your move stays organized, secure, and on schedule.
Pre-Planning Stage (6–12 Months Before Move Date)

The success of your move is determined long before any box is packed. Understand that the decisions you make during this phase will shape the entire relocation. And so this stage is all about building a strong foundation by getting organized, aligning stakeholders, and setting expectations.
Begin by notifying all key stakeholders of your intent to relocate. Clear and early communication ensures everyone is on the same page and allows time to coordinate responsibilities. Next, set a realistic relocation budget that accounts for moving expenses, downtime, equipment upgrades, and any unexpected costs that may arise.
It’s also crucial to assign a dedicated project manager or build a small relocation team. This group will be responsible for overseeing everything concerning the move. This includes timelines, tasks, and being a point of contact for vendors and internal teams.
Once your leadership structure is in place, start researching potential new office locations that support your operational needs, meet zoning regulations, and offer easy access for patients and staff. You can also start searching for trusted professionals for the move itself.
To tie it all together, review your current lease agreement and determine your required notice period or any penalties. This is also a good time to initiate your compliance planning, such as certifications needed for your new facility.
Compliance and Communication (3-6 Months Before Move Date)
During this stage, focus on meeting all regulatory requirements and keeping all key stakeholders in the loop of what’s happening. Begin by updating your address with all relevant regulatory and administrative bodies, including:
- Your state’s medical board
- Drug Enforcement Administration (DEA)
- Centers for Medicare & Medicaid Services (CMS) and all insurance payers
- Any applicable state licensing authorities
Failing to notify any of these organizations could violate legal standards. Plan for possible inspection appointments, site approvals, or credential re-verifications, especially if your move involves controlled substances or changes to your service offerings.
Keep in mind that compliance-related tasks often move slowly, so allocate extra time into your planning process. So if your new office location requires local occupancy permits, zoning clearance, or business registrations, start the process early to avoid last-minute delays.
Equipment, IT, and Layout Coordination (1–3 Months Before the Move)
Any successful move requires early coordination of your equipment, IT infrastructure, and new office layout. This is especially true for medical facilities because of how heavily they rely on tech. Use this time to assess your current setup and ensure your new office location can support the same functionality.
Start by notifying your IT provider or in-house team well in advance. You want them to have enough time to create a transition plan for transferring your office IT services, such as internet service, phone lines, internal servers, and cloud-based platforms.
Next, schedule a secure backup of all patient data and essential files. This protects you in case anything gets lost or damaged in transit. Before you reopen your medical facility, test all critical systems to confirm everything works smoothly. This will allow you to troubleshoot in advance and reduce downtime.
To wrap things up, finalize your new office layout and confirm all tech-related installations meet your workflow needs.
Packing and Labeling (2-4 Weeks Before Move Date)
The goal of everything done during this phase is to ensure that your items arrive safely and that they can be unpacked quickly at the new facility. Using labels to organize your move can be a game-changer. With a color-coded labeling system or room-based tags, you can indicate where each box should go in the new space.
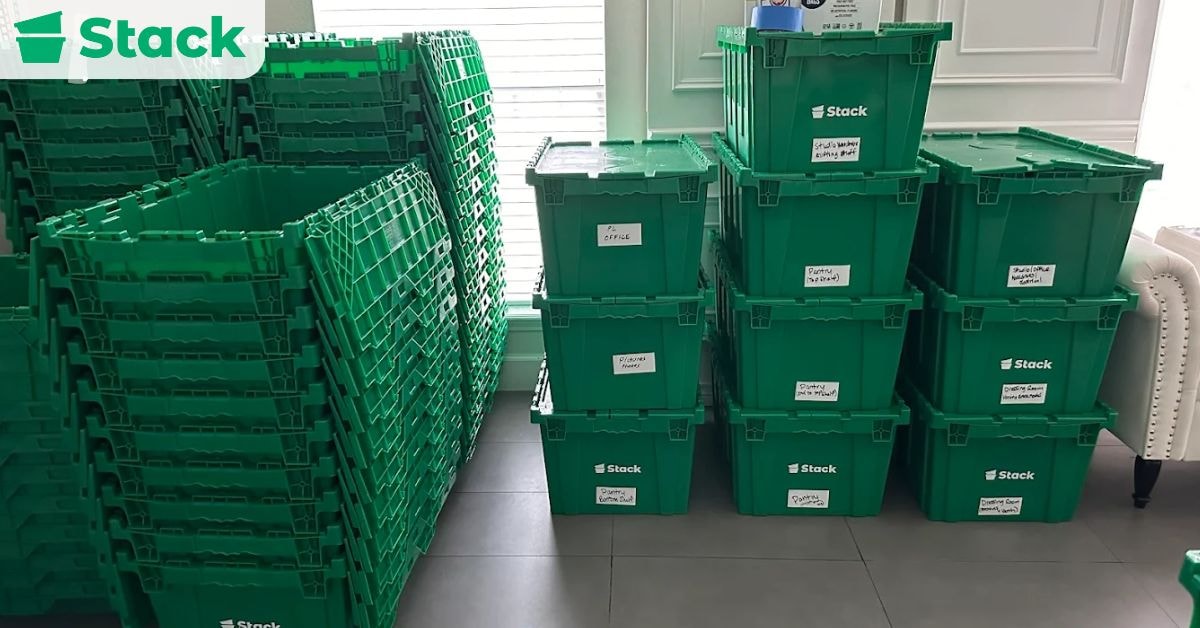
For a more efficient packing experience, consider renting plastic moving bins instead of buying cardboard boxes. These containers are not just sturdier but also more eco-friendly. Pack sensitive medical equipment using foam-lined containers or custom padding to prevent costly damage.
Heavy items should go in smaller boxes to reduce the risk of someone getting hurt from lifting them. Be sure to clearly label each box with its contents and the appropriate department so staff can find what they need quickly at the new office.
For any hazardous materials, follow all safety regulations for separation and secure transport. Confidential patient records should be packed in tamper-evident containers to maintain compliance with HIPAA and ensure privacy throughout the move.
Pack essential supplies last so they’re the first to be unpacked at your new location. Items like PPE, prescription pads, or daily-use instruments should be immediately accessible once operations resume.
Final Preparation (1 Week Before Move Date)
In the final week leading up to your medical office move, your focus should shift to execution. By now, you should’ve packed all non-essential items and labeled every box with its content and destination. Doing this helps to avoid any confusion on move day and speeds up the unpacking process. You can even use color-coded labels or numbers to match your floor plan, so movers and staff can easily place items where they belong in the new office.
Next, confirm all vendor appointments, moving times, and access instructions. This means getting in touch with any vendor responsible for medical waste disposal, specialized equipment, or installations. Make sure everyone has the right address, entry times, parking instructions, and contact persons. Miscommunication at this stage could cause delays or missed services on move day.
Set up mail forwarding with the postal service and transfer your utility accounts to your new office location. As a final step, prepare signage and entry instructions for both staff and patients at the new space.
Your company address should be up to date on all printed forms, digital listings, and even insurance portals. Even a temporary sign will be useful in directing patients and vendors where to go during the first week.
Move Day
This is a busy day for everyone, so it’s important to have a clear plan for how it should go. Assign staff members to supervise both the current and new office locations. The point of doing your part is to have someone on-site who can answer questions, provide access, and direct the movers as needed. It also minimizes confusion and helps catch any last-minute issues that might arise on either end of the move.
As items are being moved from your current office to the new one, secure all sensitive materials and medical equipment. This includes protected health information (PHI), controlled substances, and any diagnostic devices like an X-ray scanner. Be sure to pack, label, and move them according to the relevant safety and legal standards.
Upon arrival, inspect everything for damage. It’s best to start with your most valuable and fragile equipment before moving on to furniture and supplies. Use your office relocation checklist to confirm all items have arrived and are placed in the correct rooms. Address any issues right away with your movers.
Finally, distribute keys, access cards, alarm codes, and update your security system. Confirm that all staff members know how to enter and exit the new facility safely. Also, be sure that all security protocols are in place before you leave. You want to be sure that your office, equipment, and information are safe from day one.
Final Setup (First Week After Move Date)

Once your office is fully relocated, your first line of action should be to make sure that all systems are operational within the first 24 hours. Test your phones, internet connections, appointment software, EMRs, and internal communication tools. Even minor issues, such as a voicemail not routing correctly, can have a big impact on the patient experience.
After confirming that your core systems are up, gather your team for a brief walkthrough of the new office space. Even if everyone helped during the move, an orientation can help clarify workflow, emergency exits, and process changes. This is also a good time to remind staff of any newly implemented protocols related to the new space, such as how to use upgraded equipment or access updated digital tools.
Next on your list should be to verify that all professional licenses, billing systems, and patient forms reflect your new office address. Any inaccuracies can lead to insurance claim denials, reimbursement delays, and compliance concerns.
Lastly, send a follow-up message to your patients to confirm the move was successful. Mention your new office address, your business hours, and how they can reach you. This is also a good time to thank them for their patience during the move.
Want to Rent Reusable Bins and Cut Moving Costs?
To guarantee a successful transition, you need to create a detailed budget, set clear timelines for each task, and organize your team. The best way to accomplish this is with a comprehensive checklist. A relocation checklist won’t just help you prevent costly mistakes; it can also help you minimize possible disruptions.
Remember to start planning early, at least a year before your intended move date. Assign responsibilities to staff members and allow time for any necessary renovations or permit delays. After moving in, don’t overlook your post-move assessment.
And don’t forget that your assets are far too valuable to be packed in flimsy moving containers. Instead, opt for reusable plastic moving boxes offered by rental companies like Stack Moves. They’re strong, secure, and stackable, making them perfect for protecting sensitive equipment and confidential records in a high-stakes healthcare environment. Ready to simplify your move? Rent a moving bin today!
Frequently Asked Questions
There are many parts to planning a medical move, literally and figuratively. These FAQs address common concerns that medical practices face when preparing for a smooth and compliant move.
How Far in Advance Should I Start Planning My Medical Office Move?
Ideally, planning should begin 9-12 months before your intended move date. This gives you time to get everything set. You can notify your patients, secure necessary permits, and book a professional moving company experienced in medical facility relocations.
What Packing Materials Are Recommended for Fragile Medical Instruments?
Firstly, make sure you consult professional movers who specialize in medical office relocations to ensure proper handling and transport of your devices. That said, sensitive equipment should be packed with high-quality materials such as foam inserts, anti-static bubble wrap, and hard-shell crates. Avoid using standard boxes or cheap fillers, as they won’t protect against damage or shifting in transit.
What Items Should Be Prioritized for Packing First in a Medical Office Move?
Start by packing non-essential items such as archived records, excess office furniture, and seasonal supplies. Gradually move toward less frequently used medical equipment and office décor. Leave essential tools and patient care equipment until the very end to avoid interruptions to your daily operations.
Can I Customize the Medical Office Relocation Template for My Practice?
Absolutely. Just like every business is different, every medical practice has its unique business needs. Your relocation checklist should be tailored to what happens in your business. This will help you allocate your resources more efficiently.
Rent Plastic Bins for Your Move!
Moving with cardboard boxes is a pain. Get pre-assembled bins delivered to your door and move hassle-free with Stack!
Stack eliminates the need for you to source, break down, or fill up your trash can with cardboard boxes.